
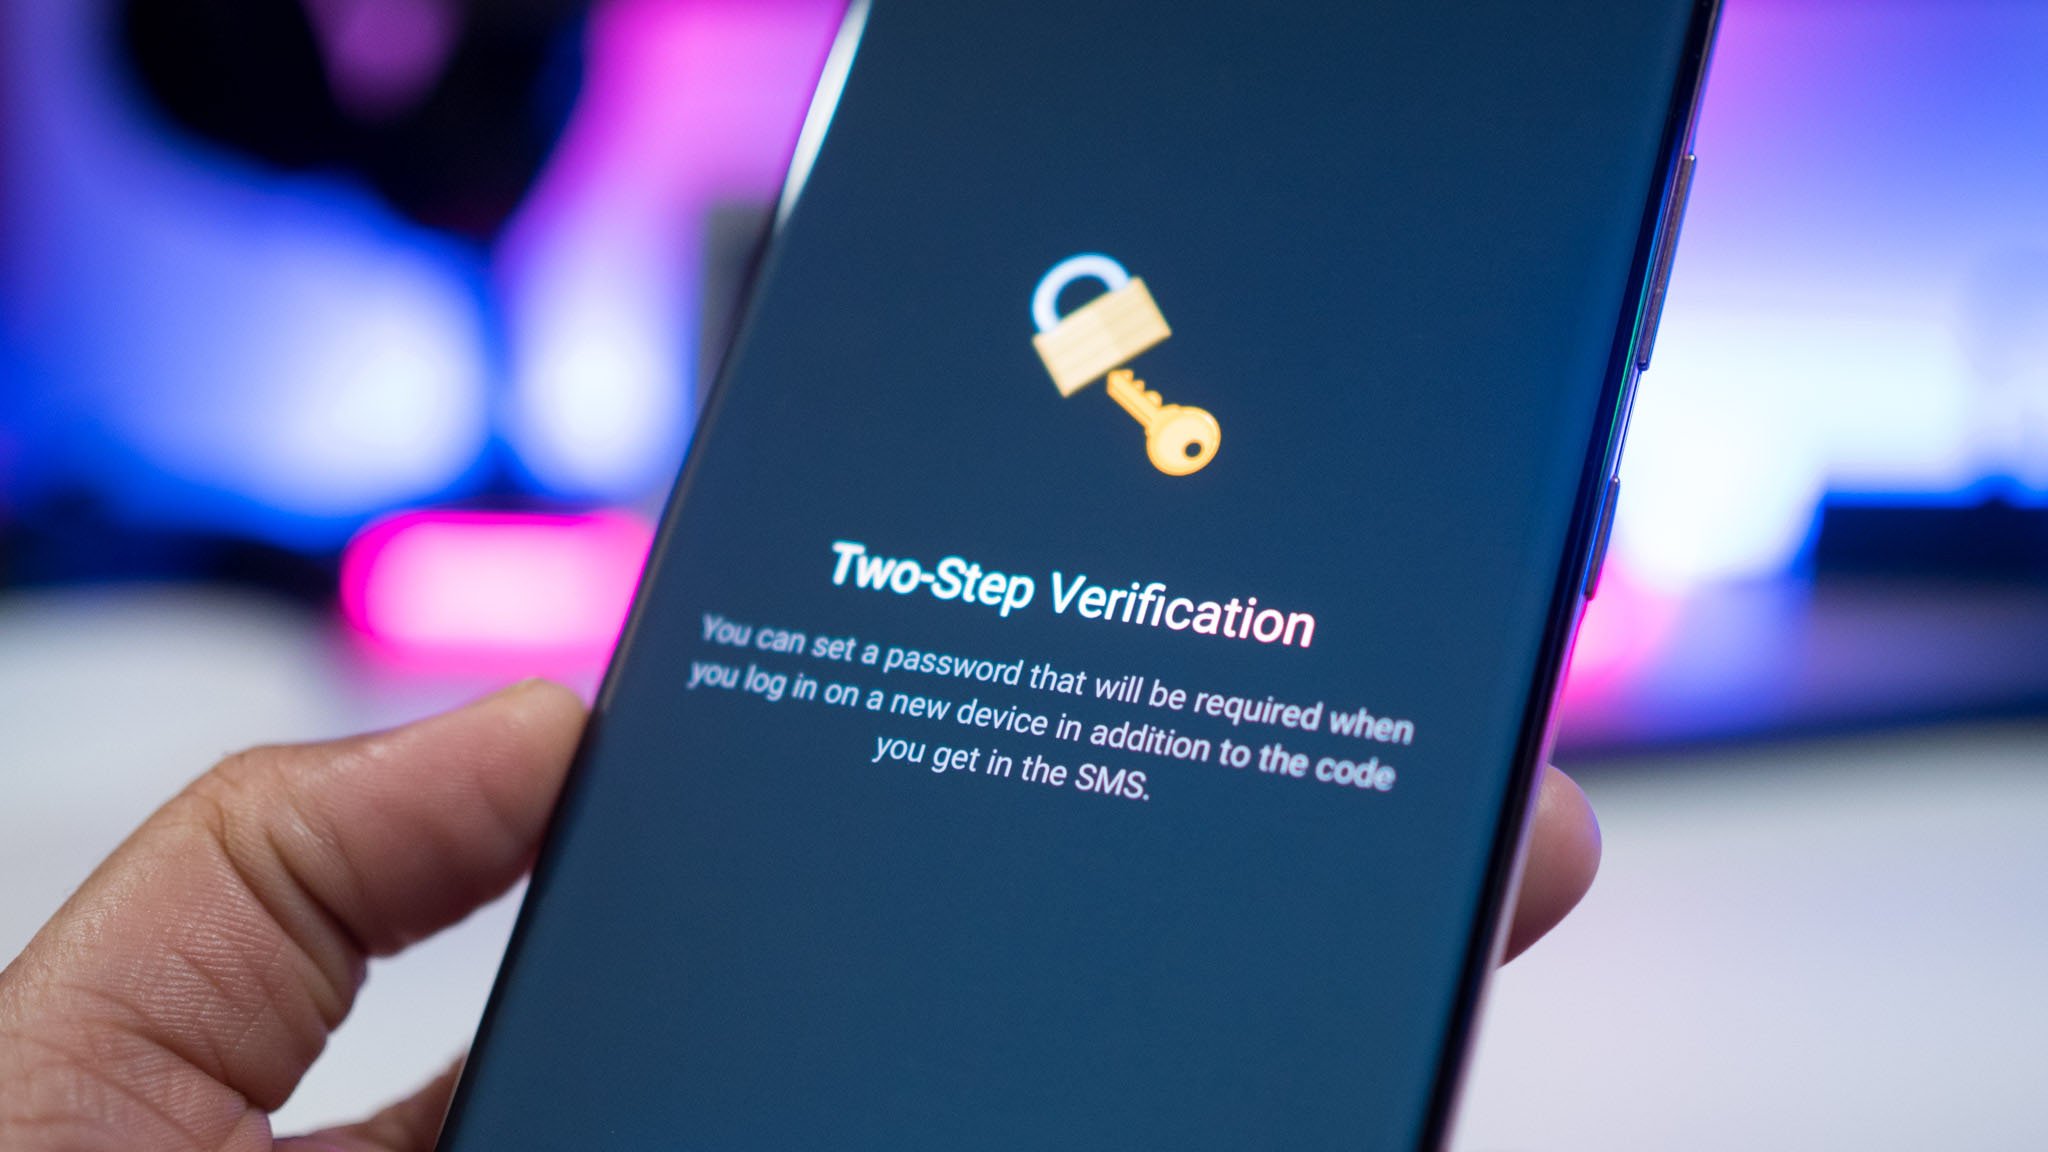
Telegram rolled out two-step verification five years ago, and if you've been using the service for a while now or are just getting started, you should enable it right now. Setting up two-factor authentication on Telegram takes less than five minutes, and it provides much-needed safeguards to your account. Here's how to secure your Telegram account with two-factor authentication.
How to activate two-factor authentication on Telegram
Your Telegram account is tied to your phone number, and you'll receive a one-time code whenever you have to sign in to a new device. With two-factor authentication, you can set up a password in addition to the one-time code; you'll have to enter both to log in to your account. Here's how to set up two-factor authentication on Telegram:
- Open Telegram.
- Hit the Hamburger menu on the left.
-
Select Settings.
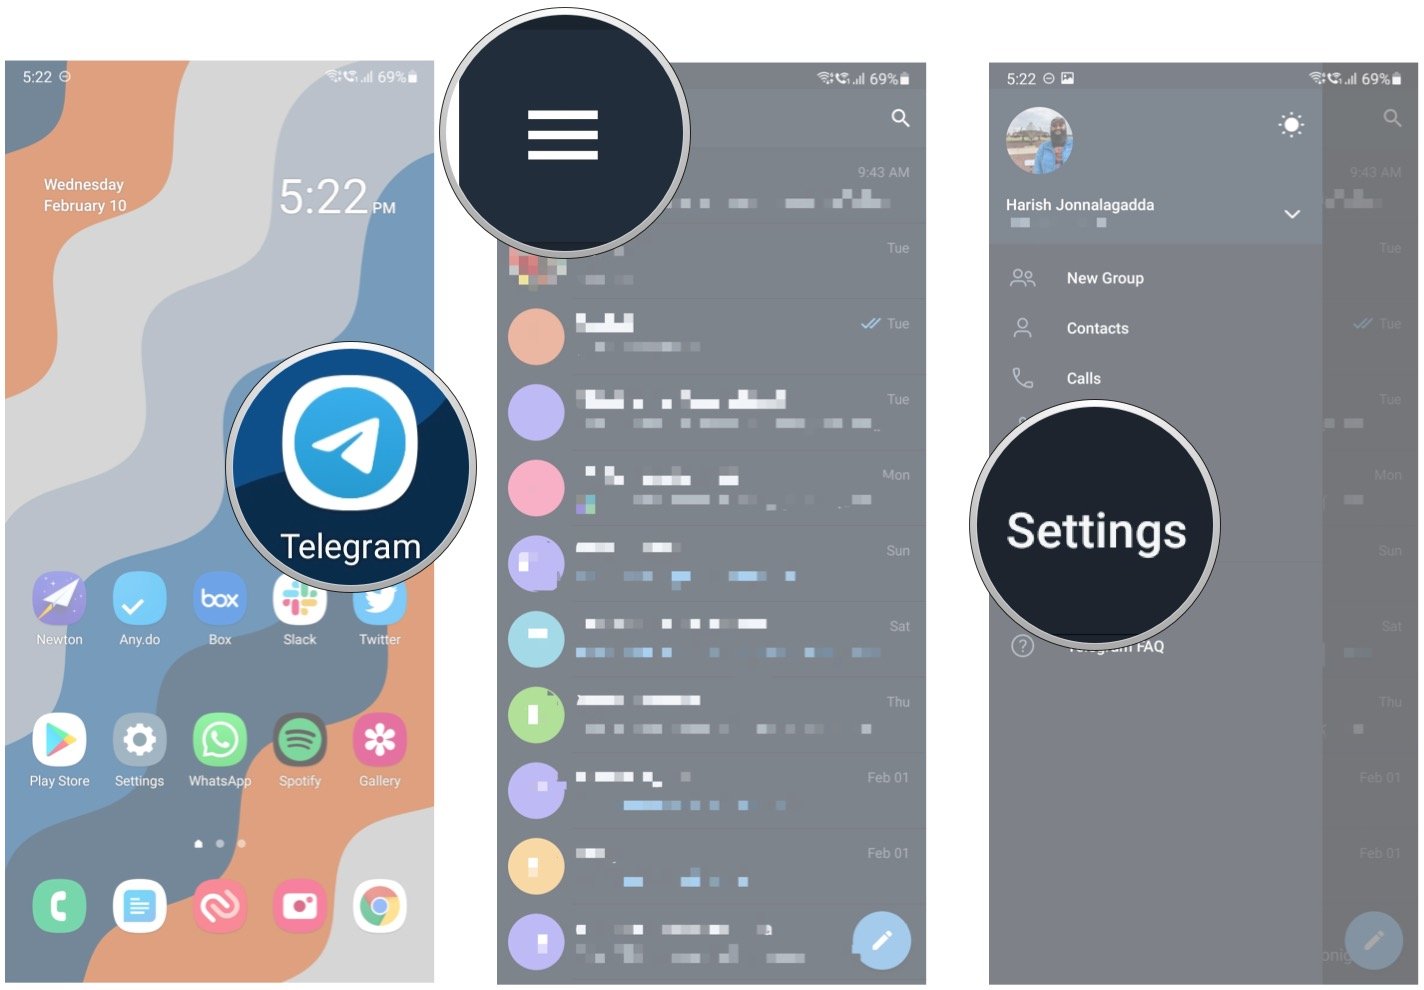
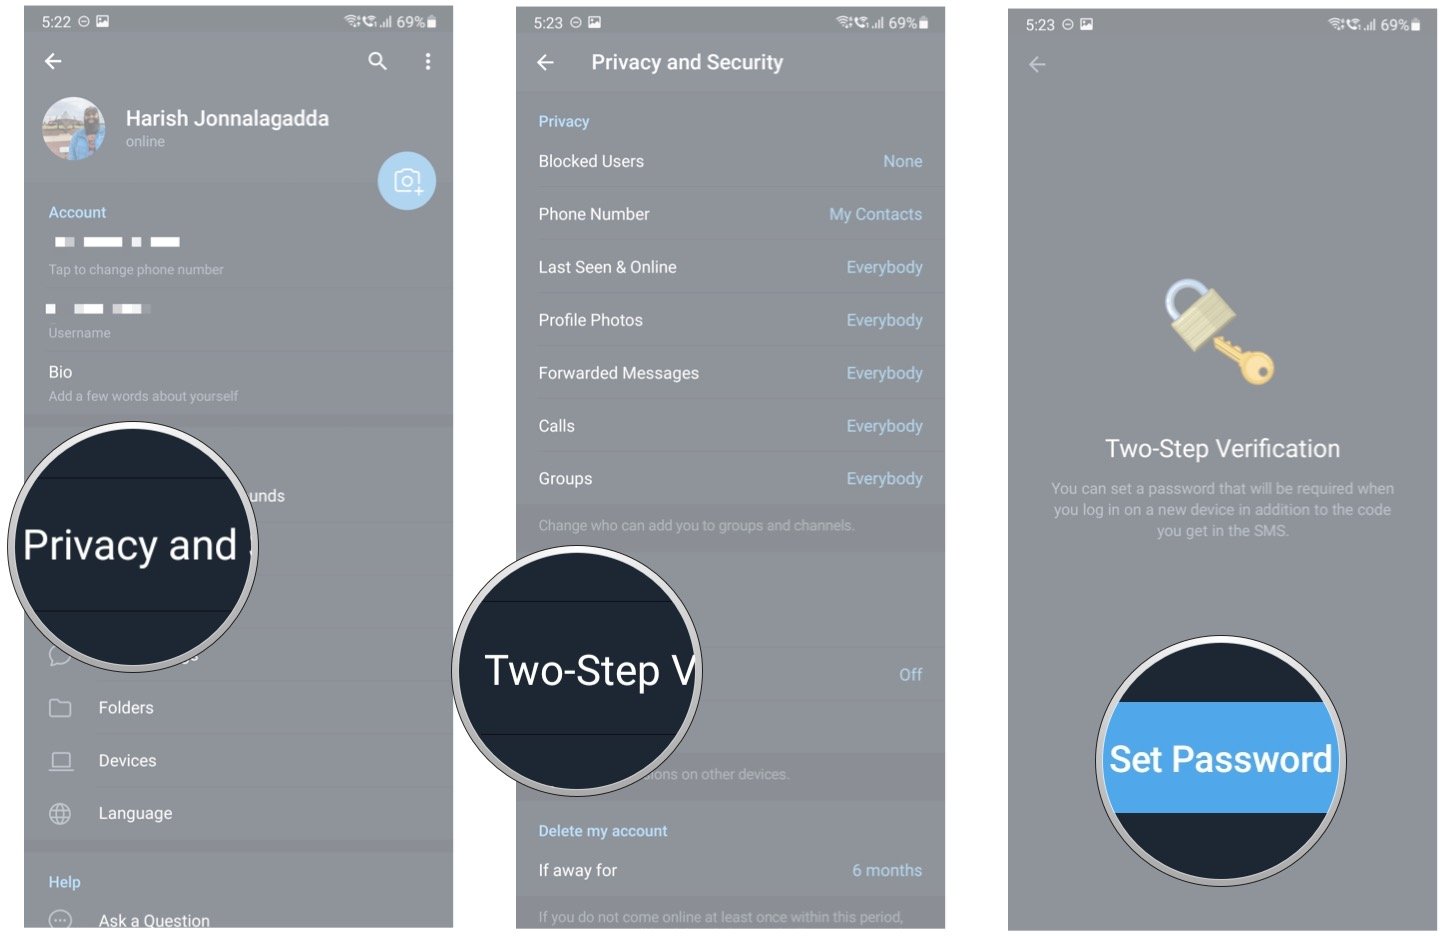
- Go to Privacy and Security.
- Tap Two-Step Verification.
-
Hit Set Password.
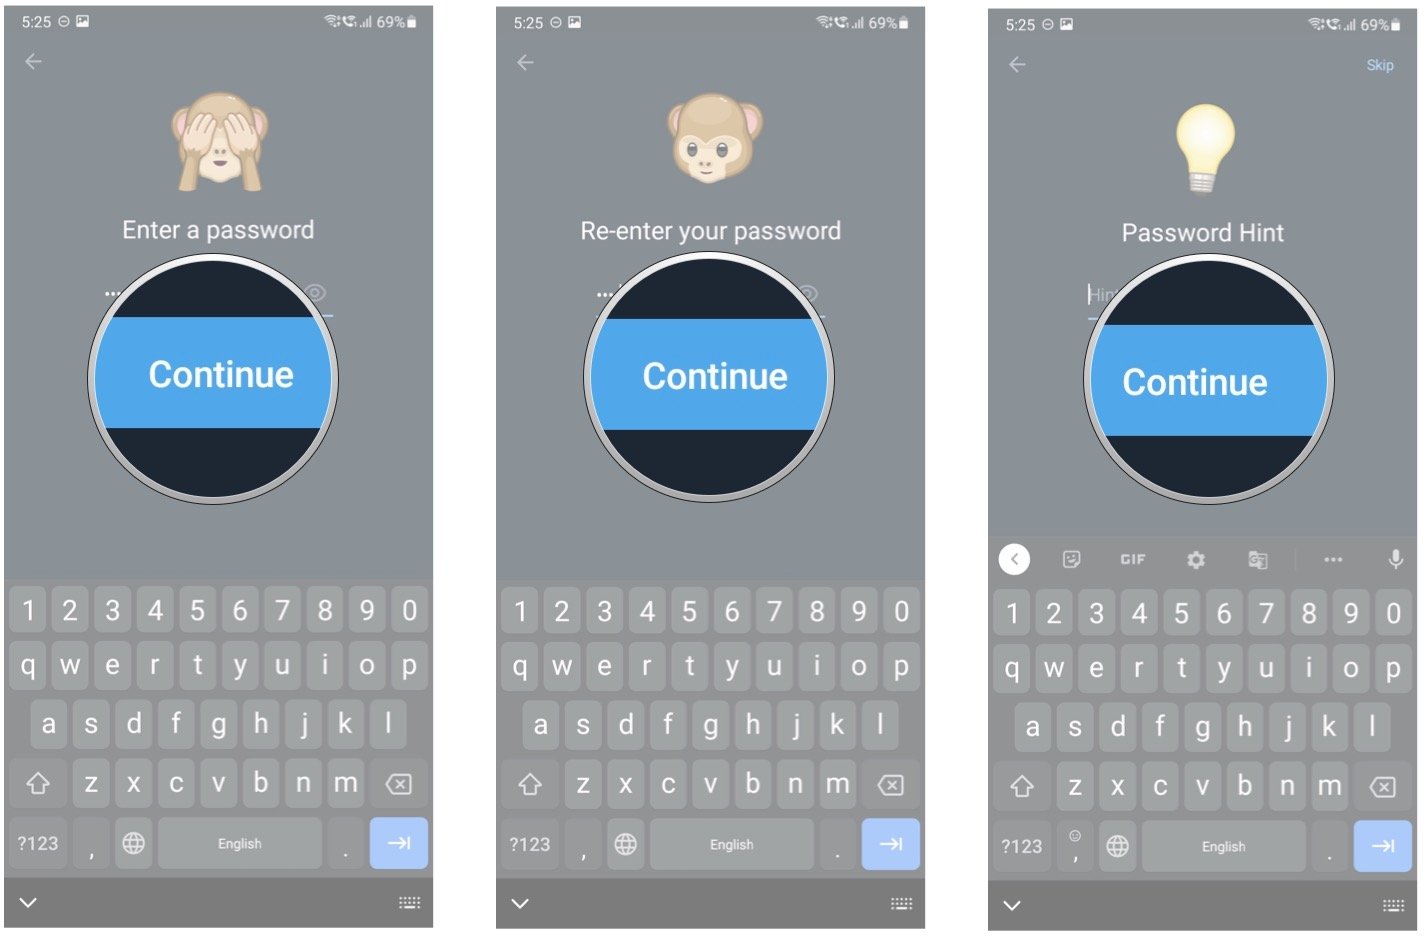
- Enter the password you want to set.
- Confirm the password.
-
Add a hint for your password.
- Add a recovery email. If you forget your password, you will be able to reset it from the code sent to your email.
- You'll receive a verification code at your email address. Enter the code here to authenticate your email.
-
That's it! Hit Return to Settings to finish setting up two-factor authentication.

Telegram was the most-downloaded app globally in January 2021, with the service picking up over 64 million installs over the course of the month. Facebook's fumbles with WhatsApp have allowed Telegram to gain momentum, and the platform is one of the best Android apps for messaging.
The app has a tiny footprint and doesn't use too many resources, making it a great choice even on phones under $200. Combine that with the array of features available and it's easy to see why Telegram is on the rise.
Post a Comment