Using two-factor verification makes sure that you — and only you — have access to your Google account.
In a world where we're constantly becoming more and more digital, maximizing the security of your online accounts is one of the most important things you can do, whether or not you have one of the most secure Android phones.
A strong password is a good start, but if you want to take things to the next level, you need to use two-factor authentication. This adds another layer of privacy to your account, often requiring you to enter a randomized code every time you log into your account in addition to your password.
Your Google account is likely one of the most important you have, and thankfully, setting up two-factor authentication for it is quick, easy, and can be done in a few different ways. We'll walk you through it all and show you how to enable 2FA on your Google account.
How to set up Google Prompt two-factor authentication
Google allows you to use a variety of two-factor authentication methods, but the default (and easiest) one is Google Prompt. When you log into your Google account on an unknown device, you'll get a prompt on a phone or tablet that you're already logged in on. Tap that prompt to confirm it's you trying to sign in, and you'll be on your way.
This is the two-factor method Google recommends, and this is what the setup process looks like.
-
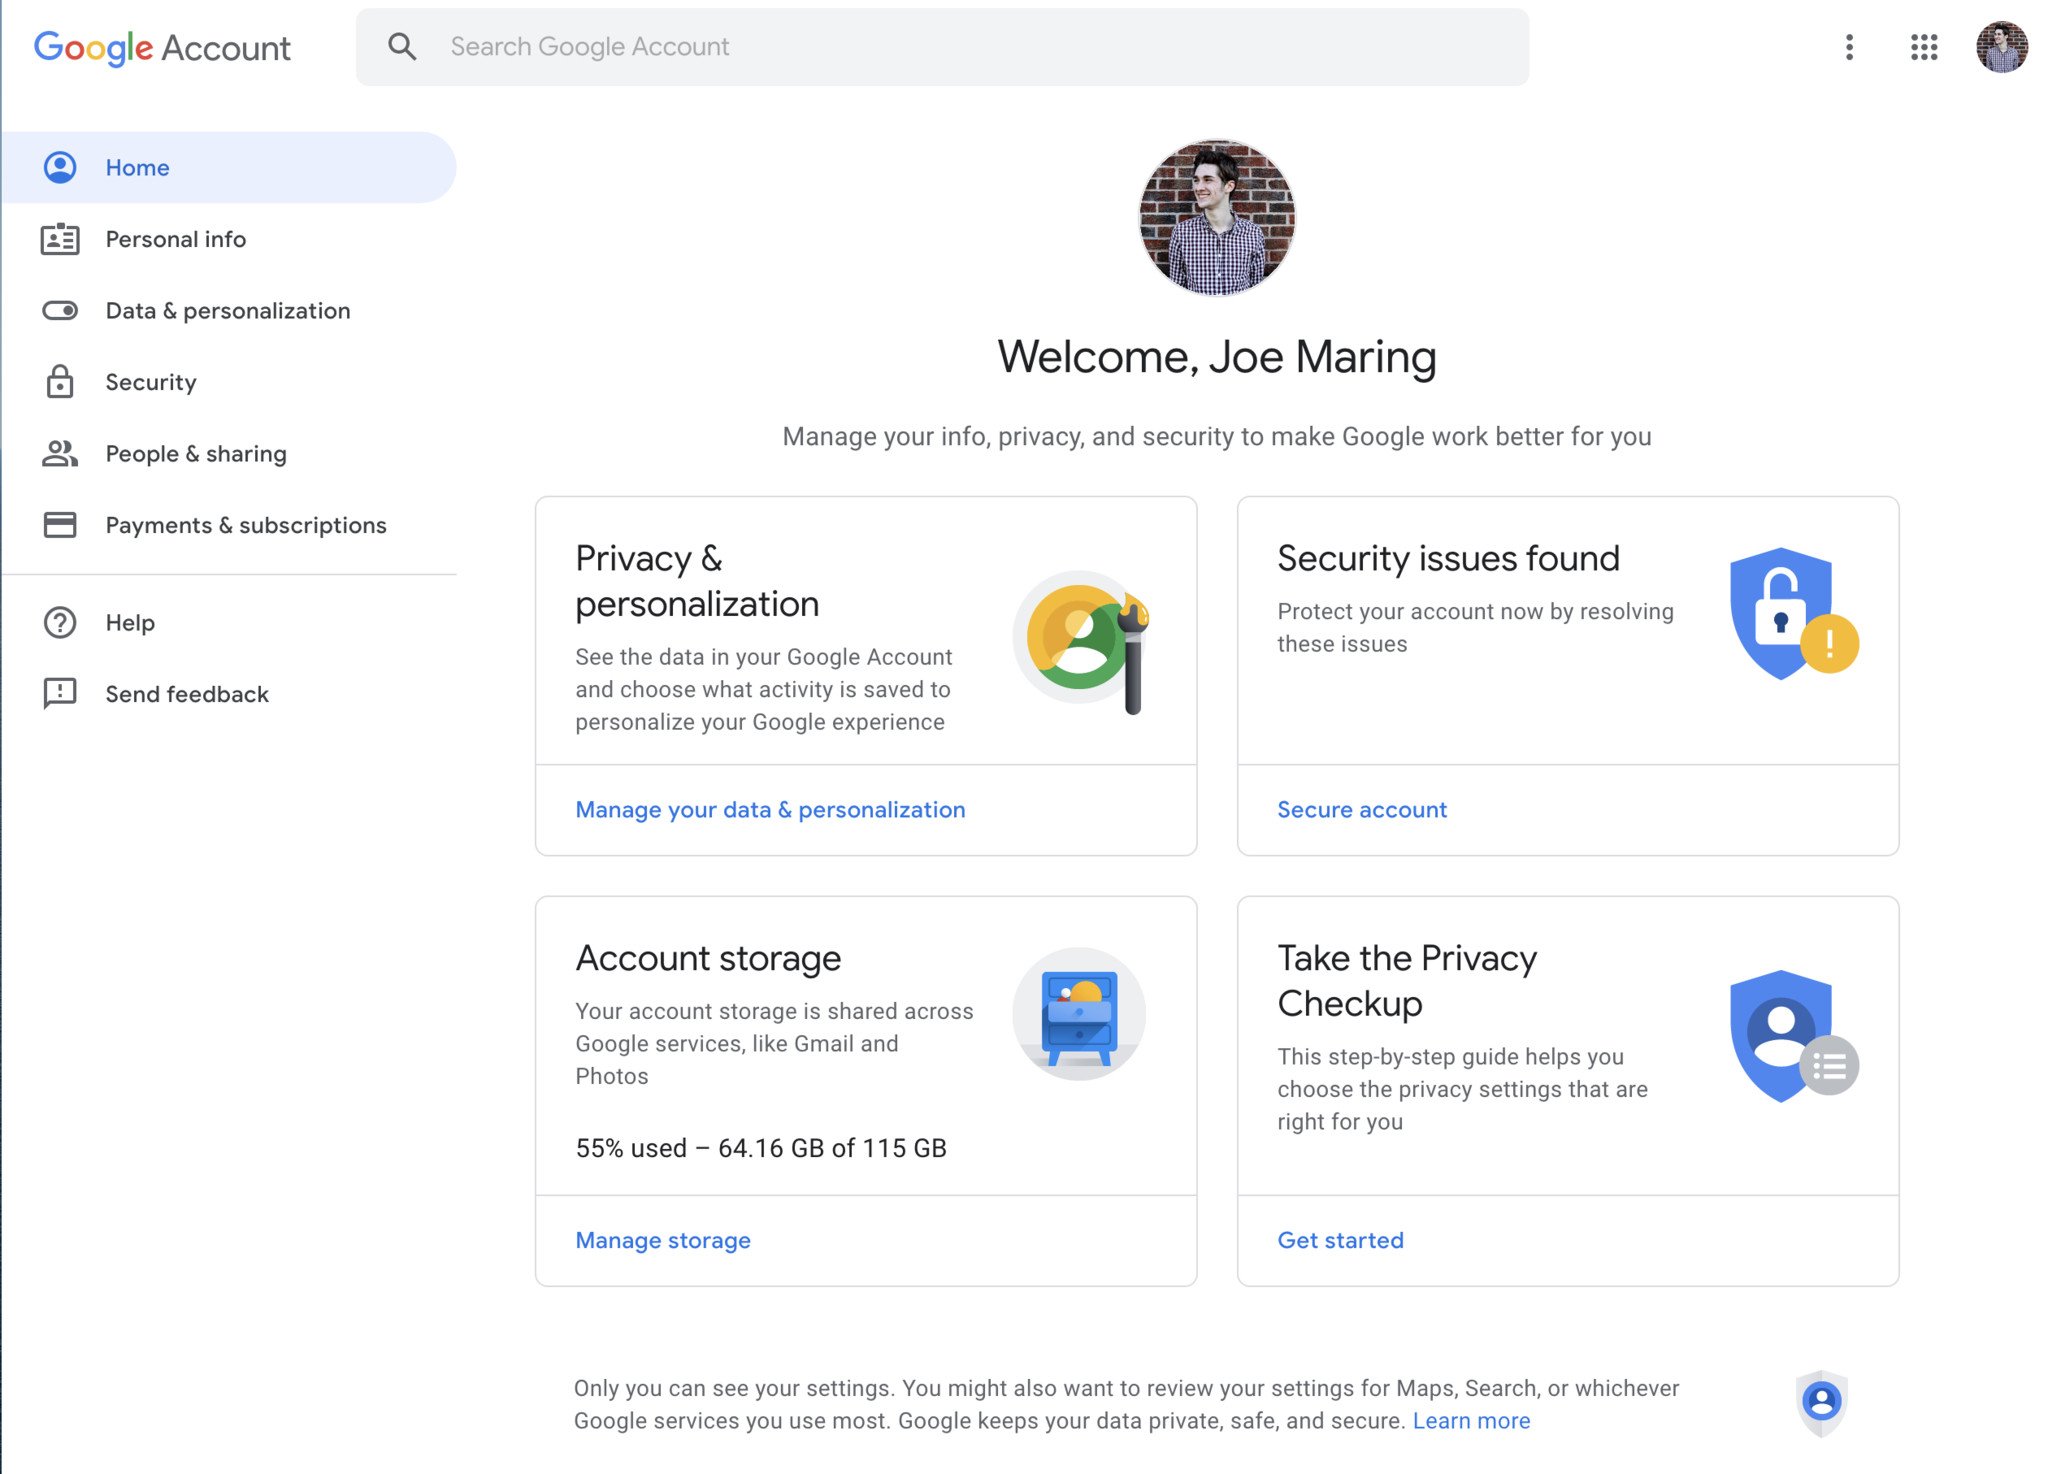
Log in to your Google account on myaccount.google.com on your computer.
-
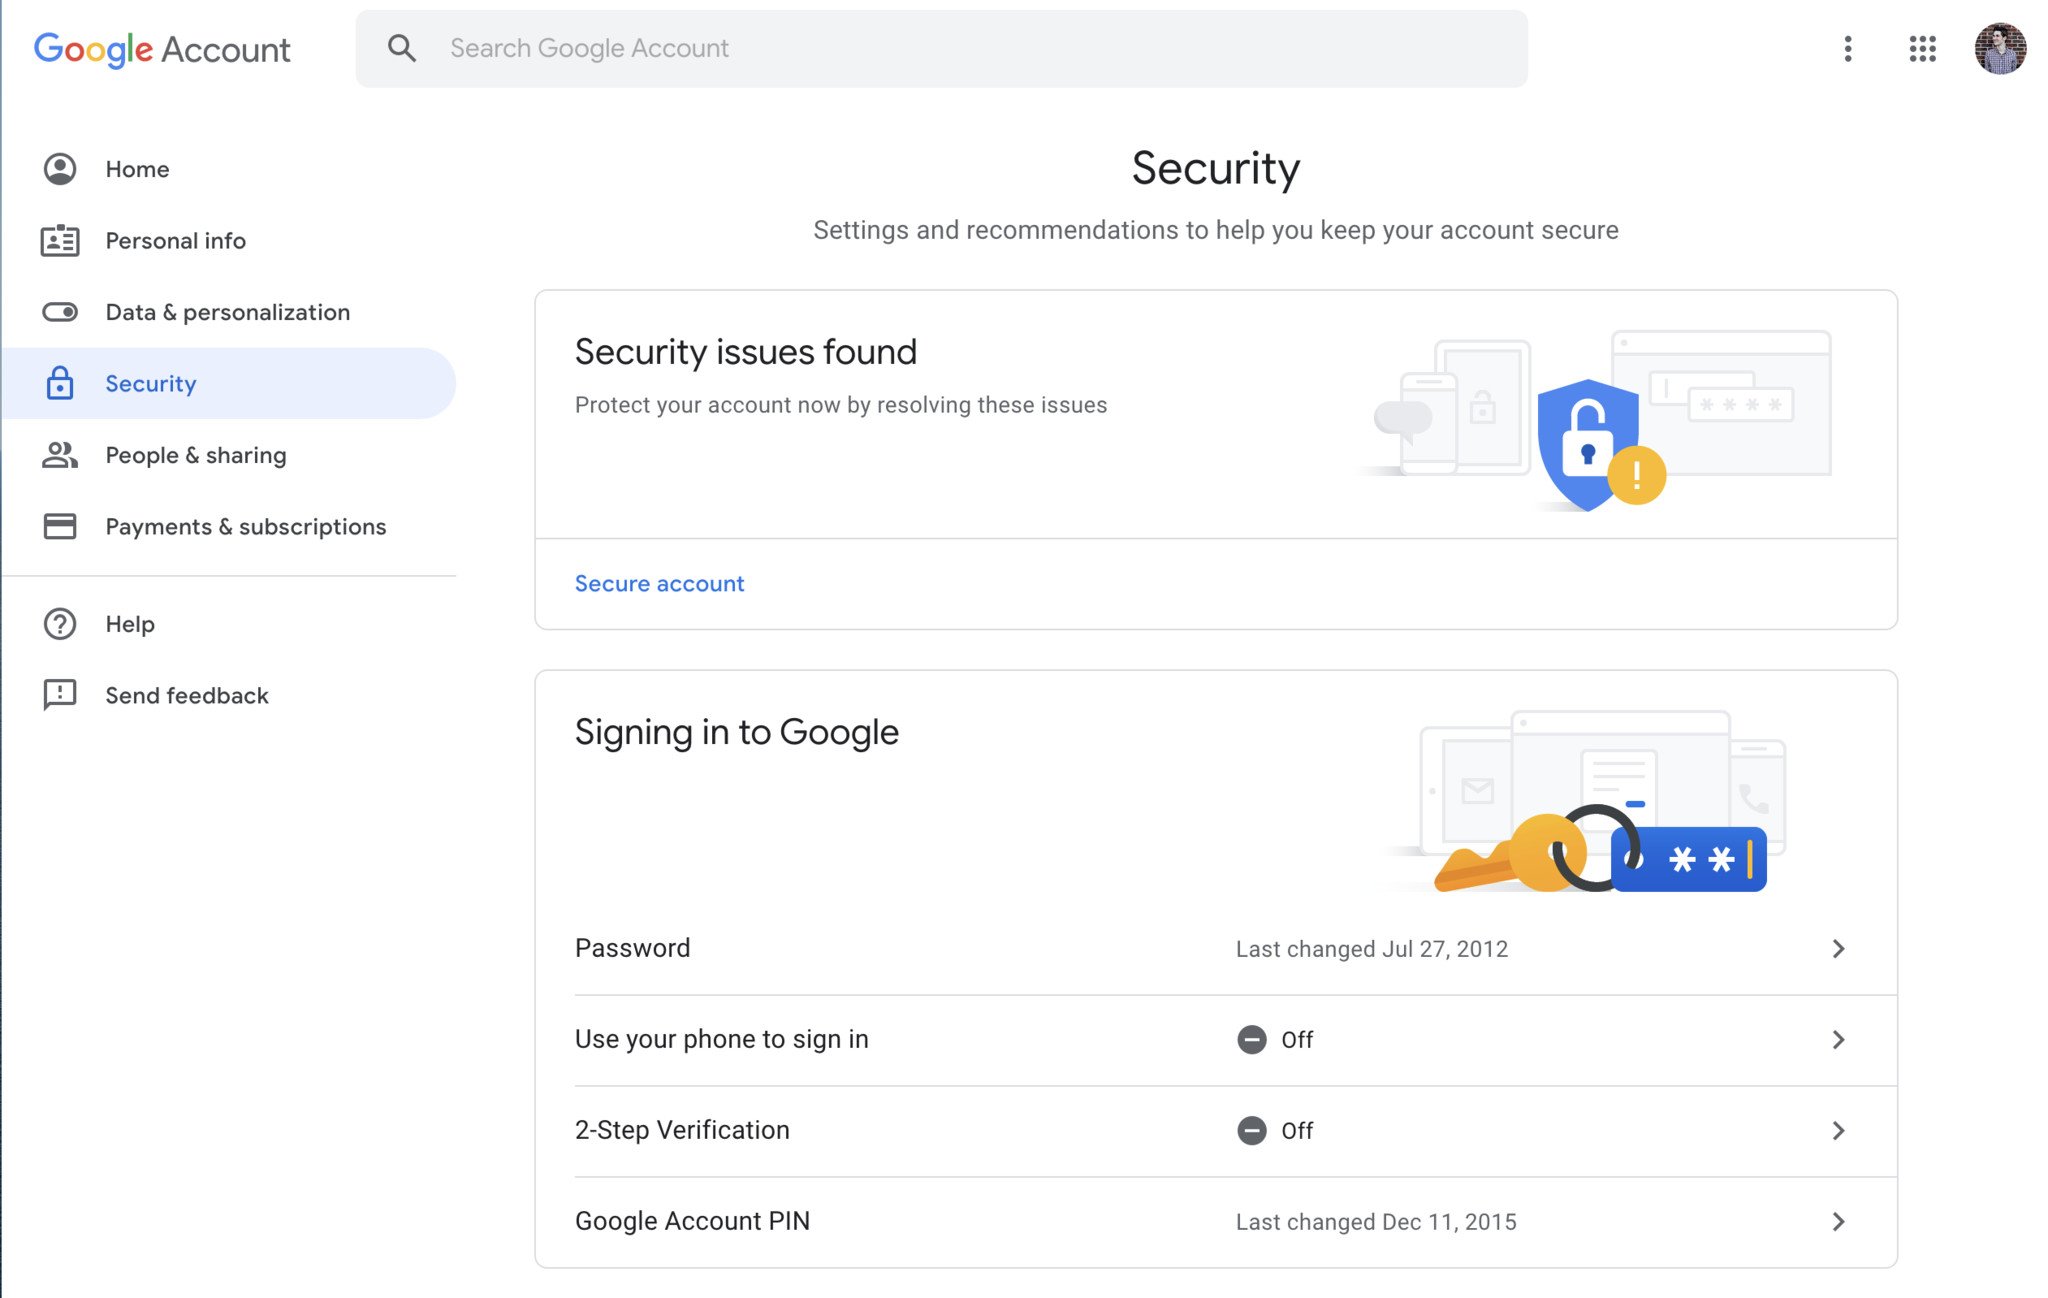
Click the Security tab on the left.
- Click 2-Step Verification.
-
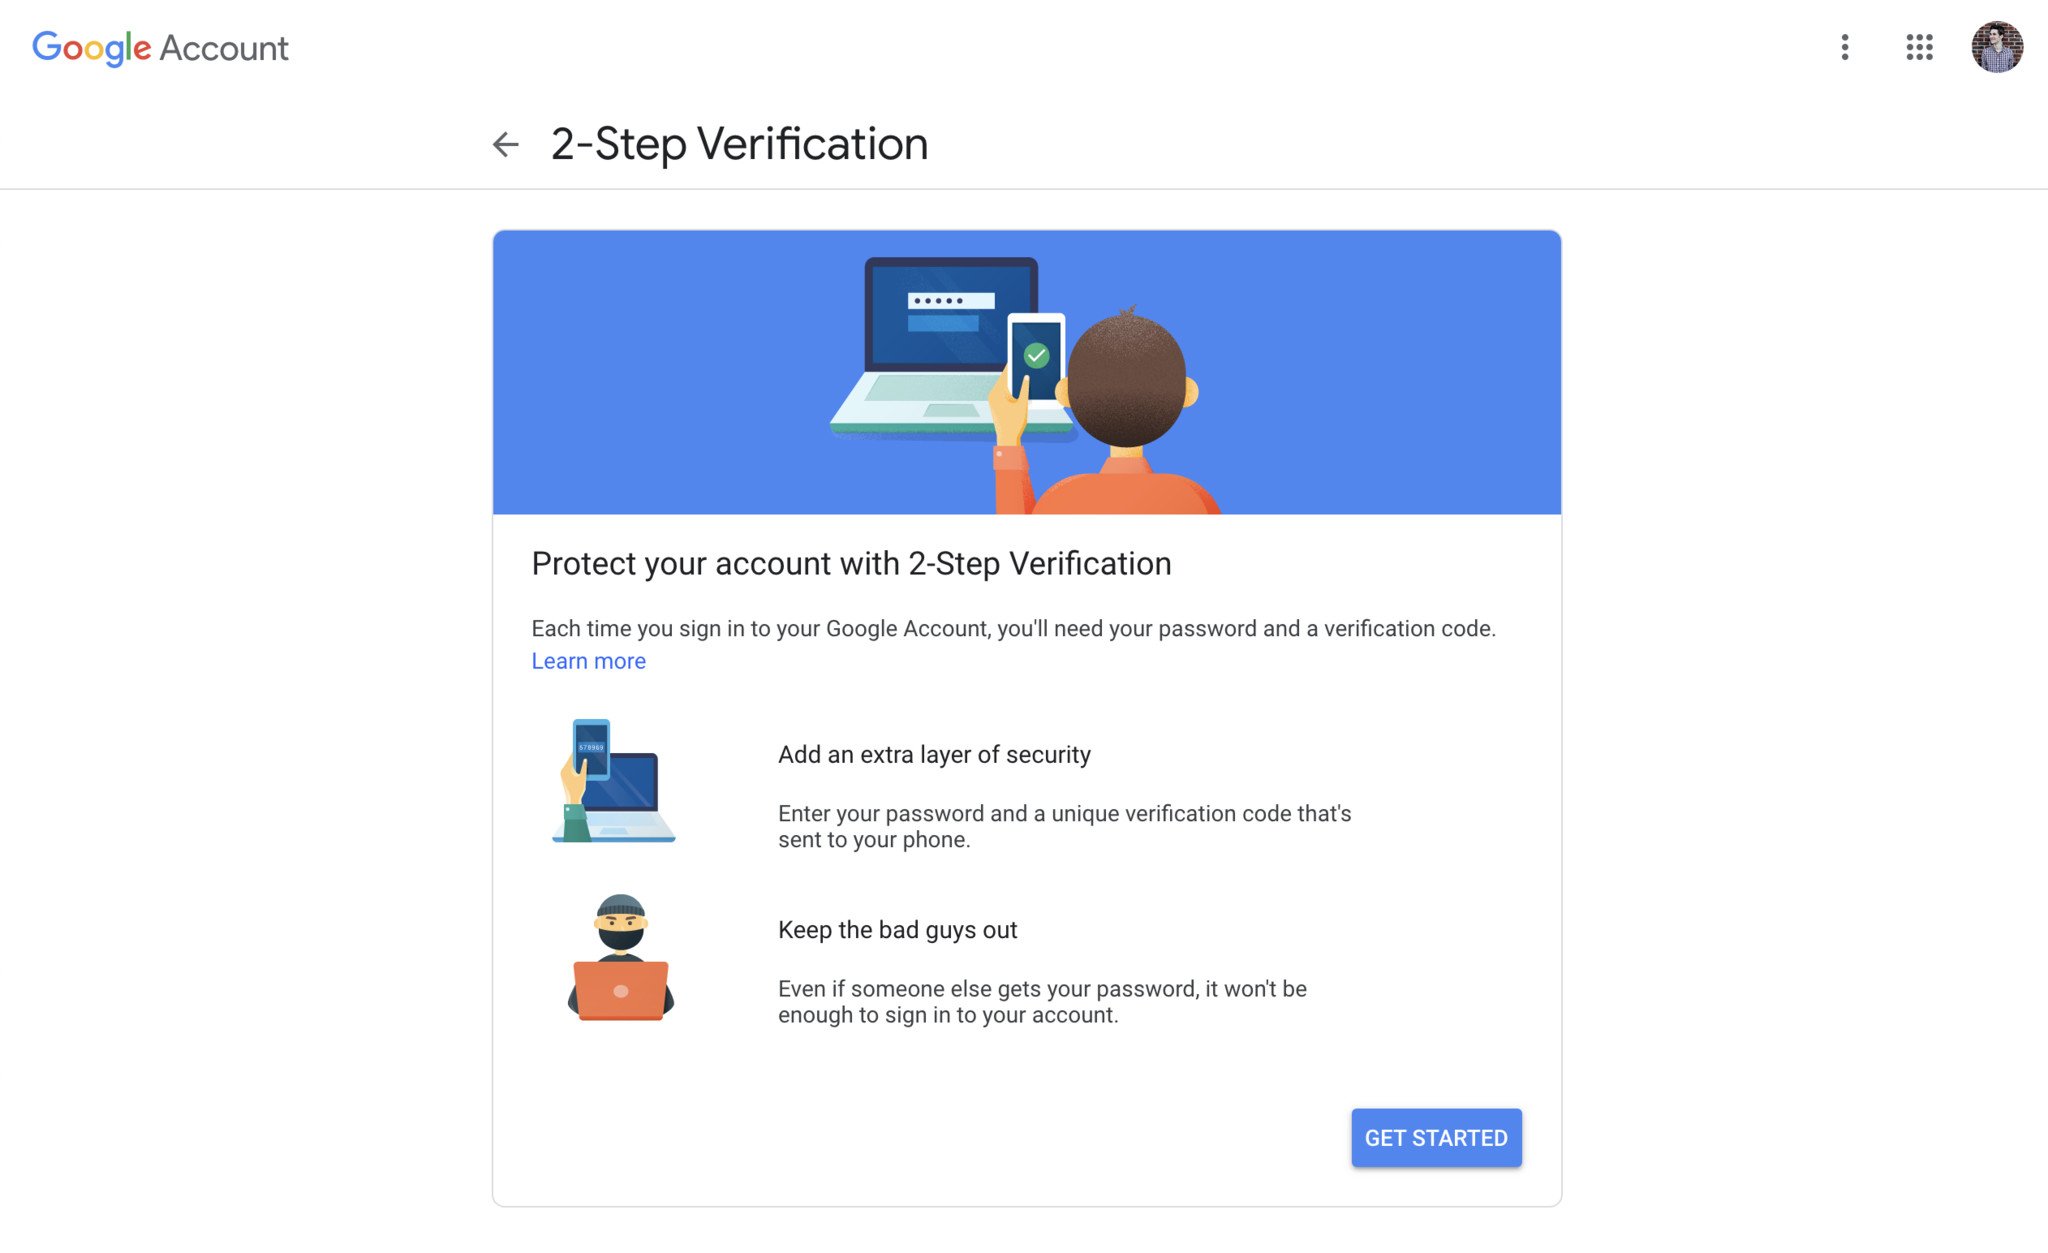
Click Get Started.
-
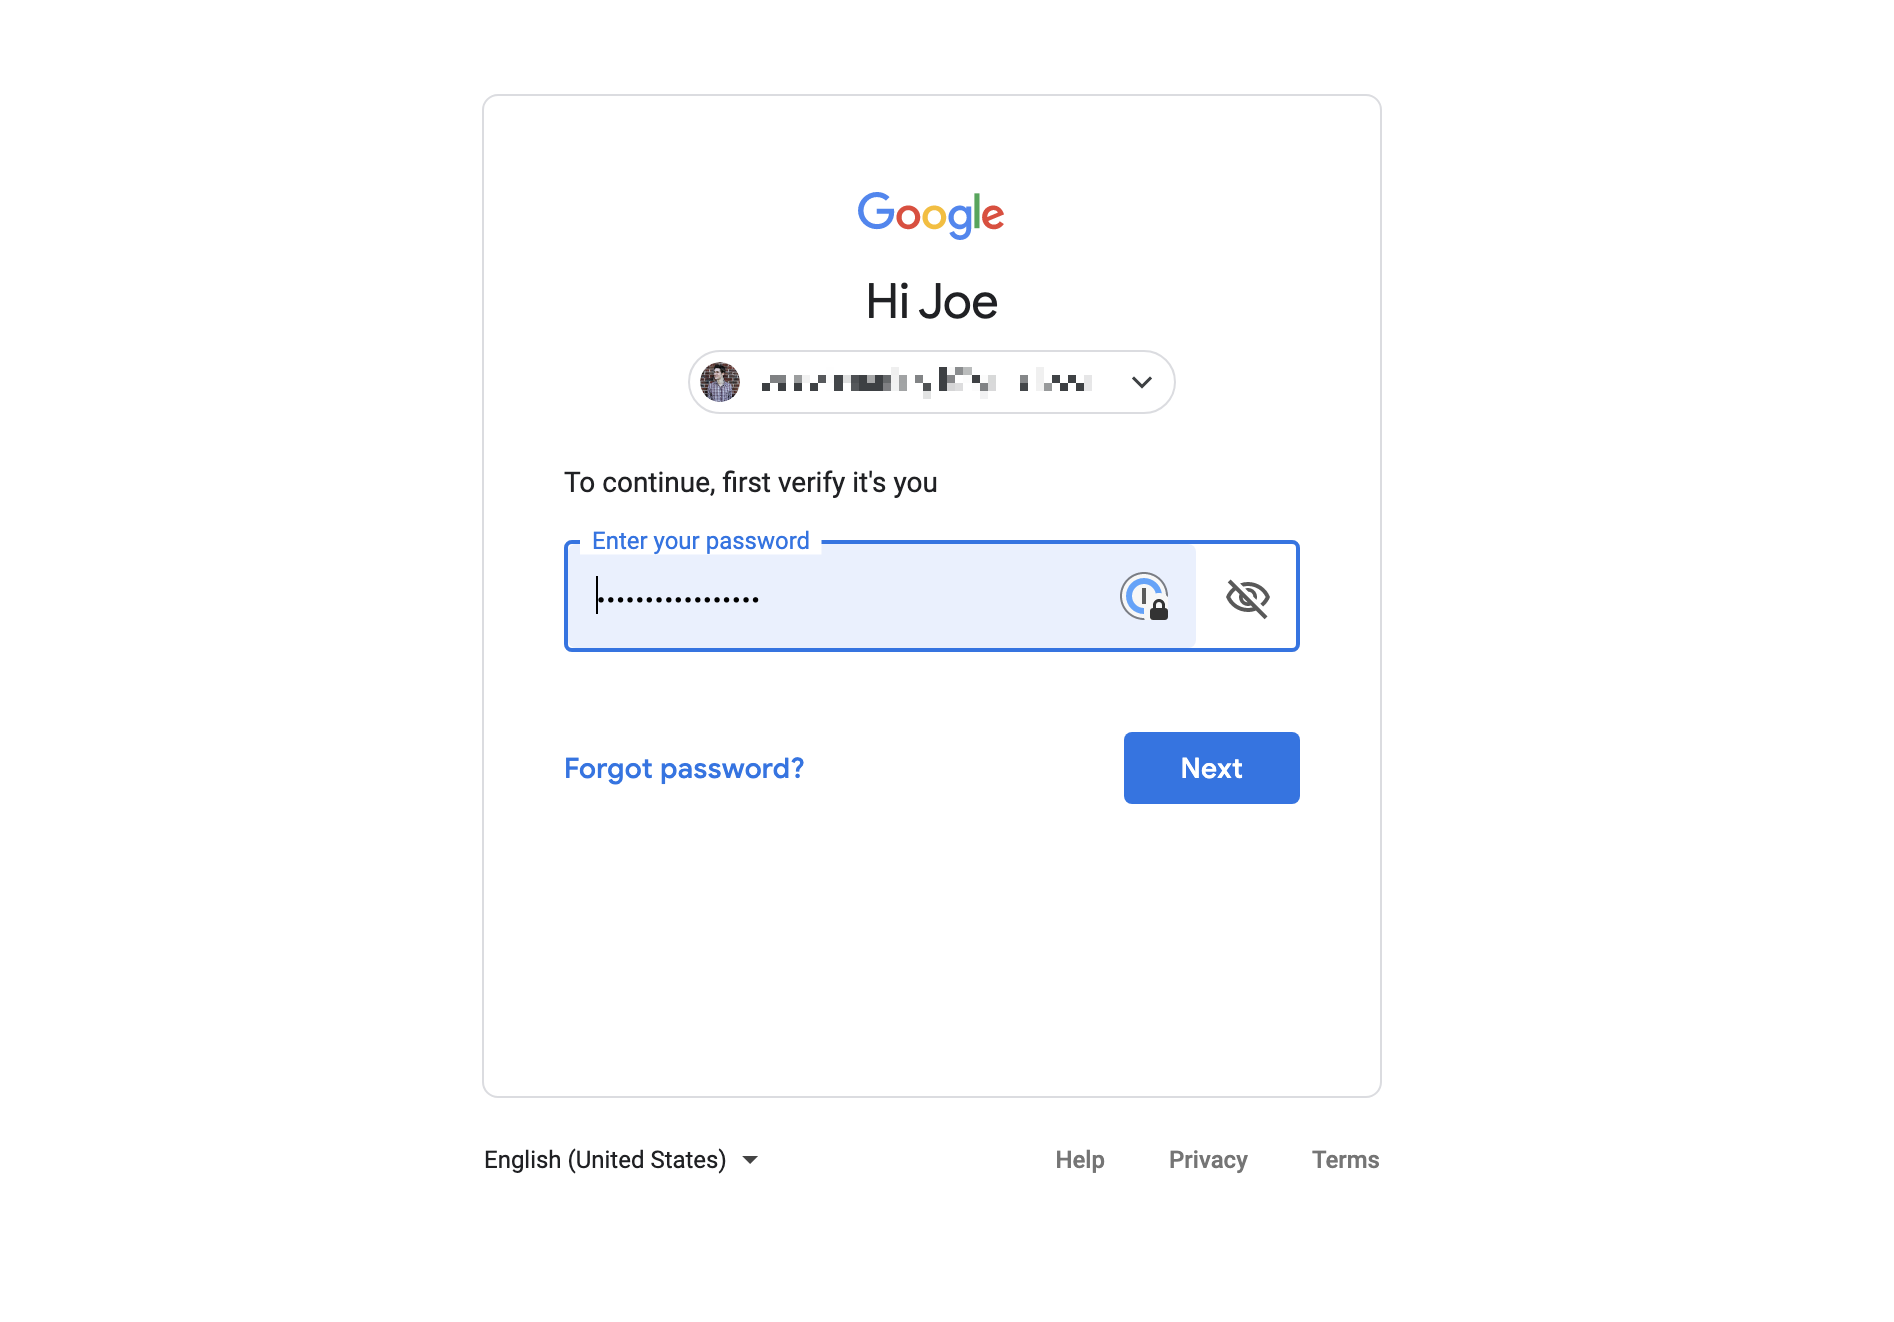
Enter your Google password to confirm it's you.
-
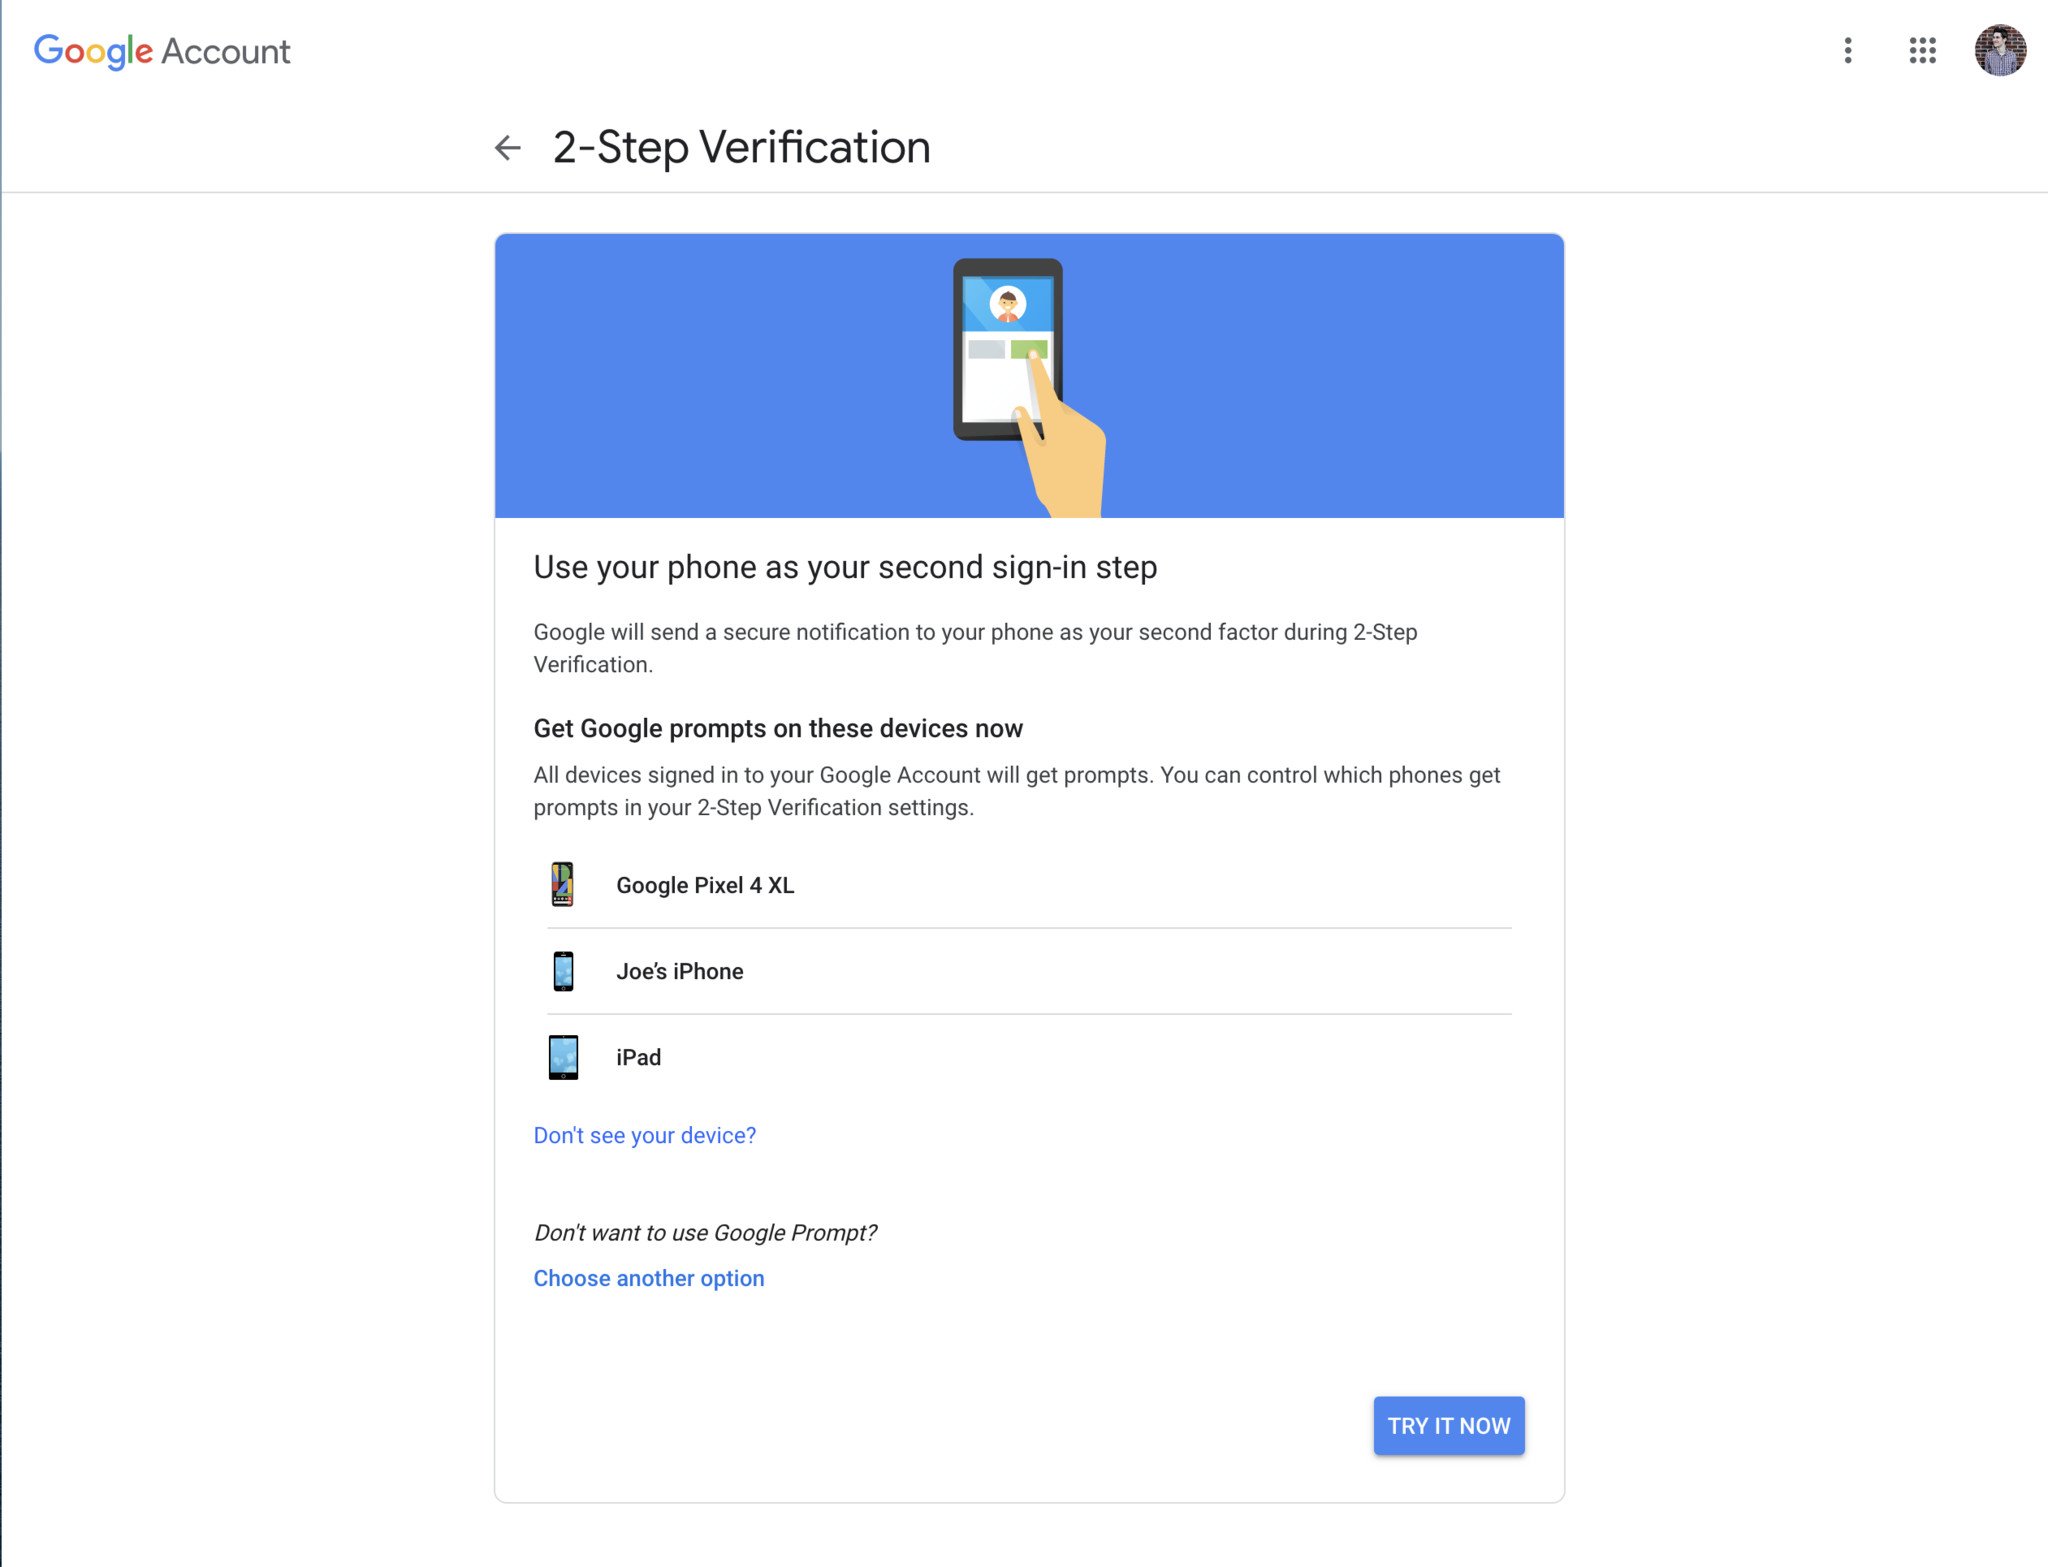
Click Try It Now
- Tap Yes on the Google pop-up that appears on your phone/tablet.
-
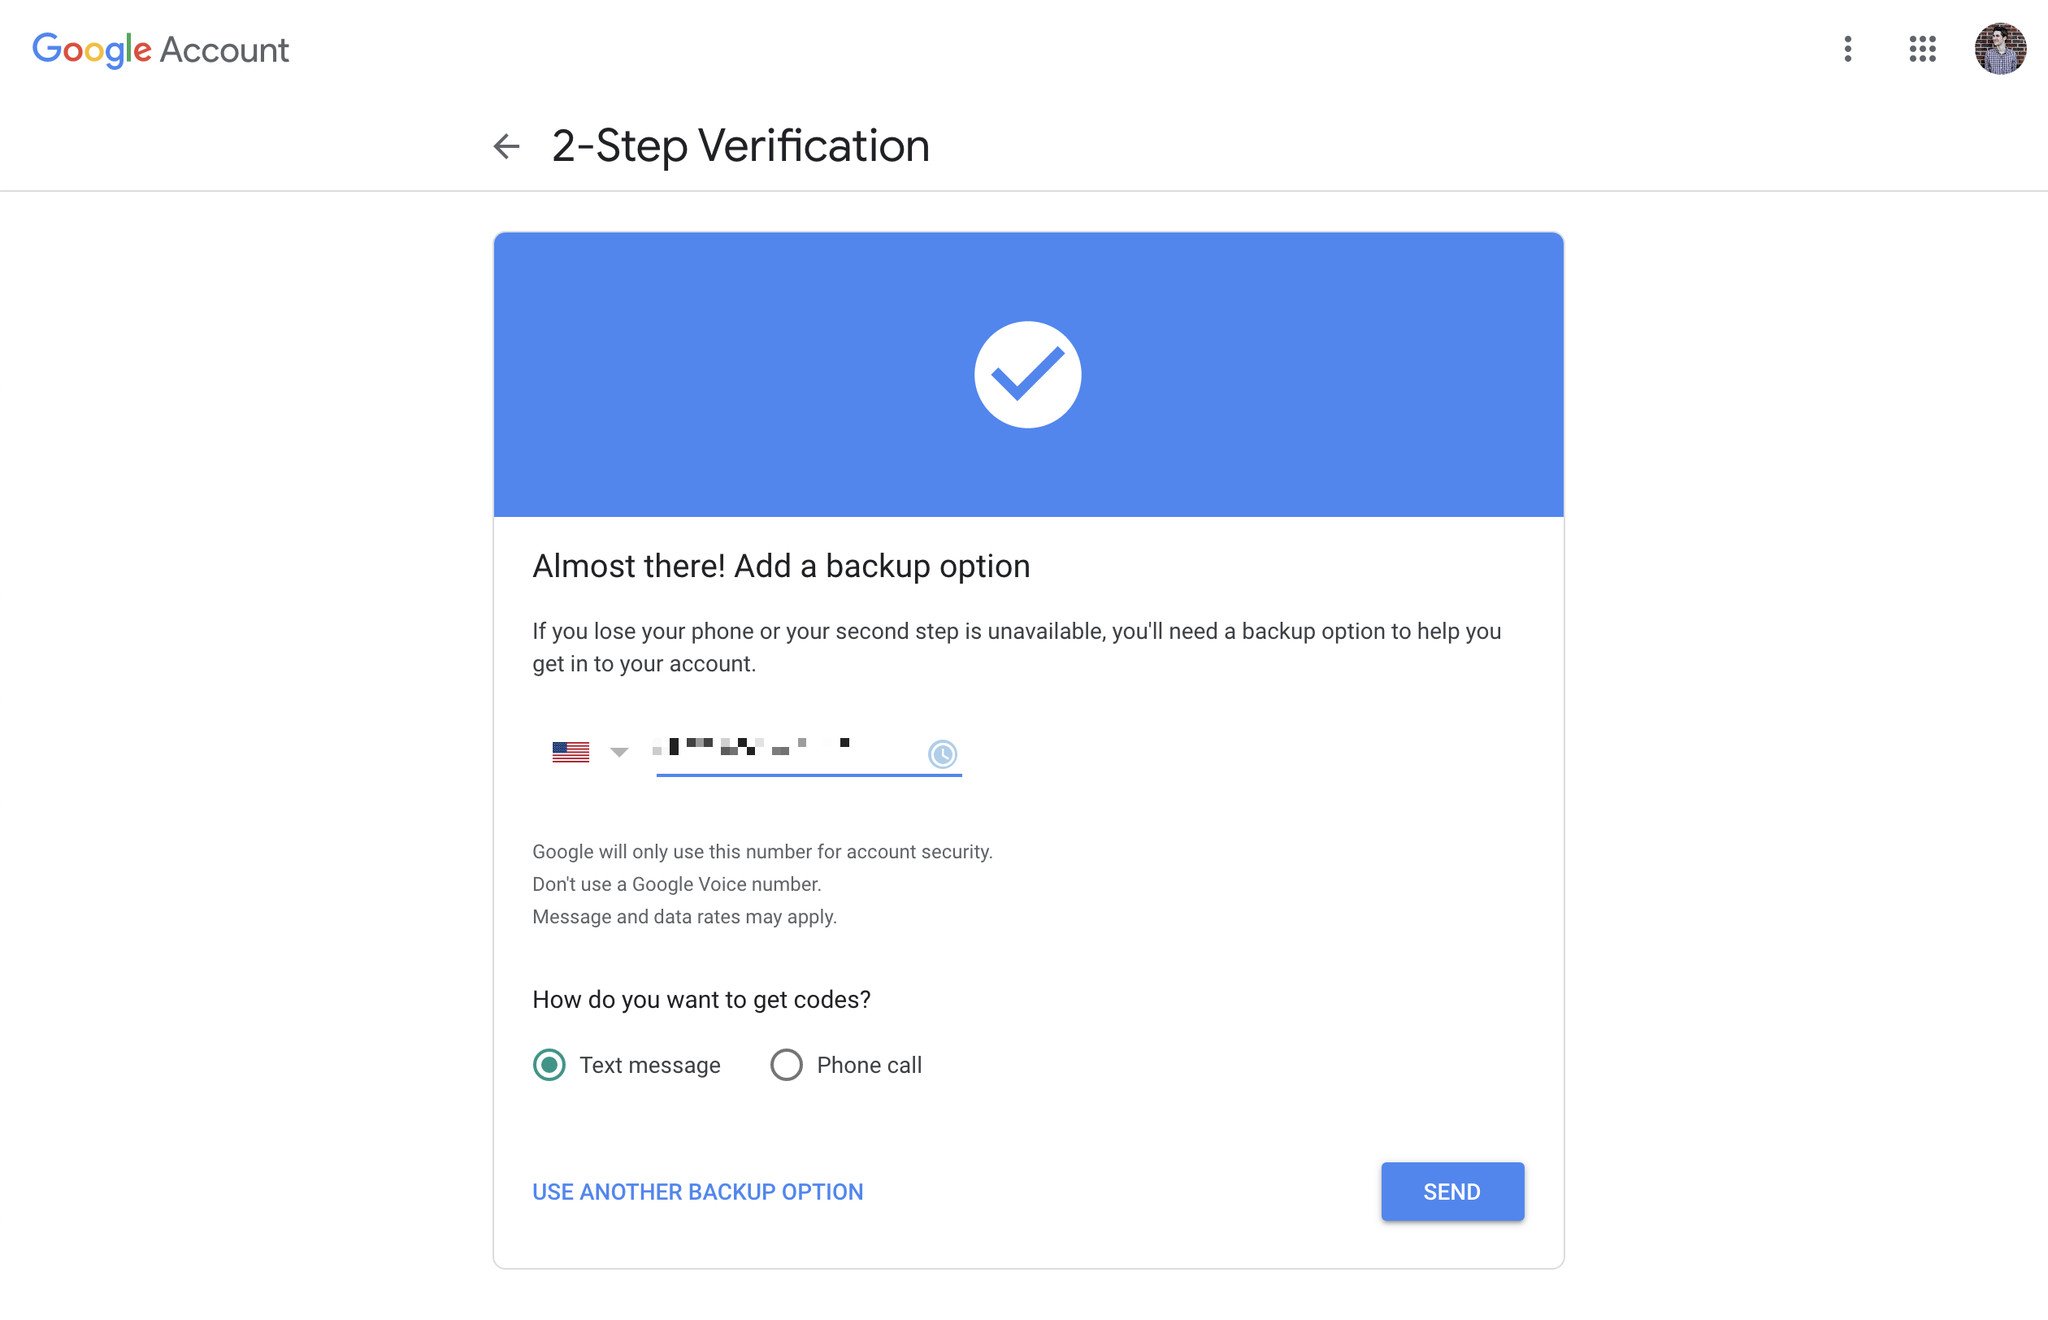
Confirm your phone number as a backup option in case Google Prompt doesn't work.
-
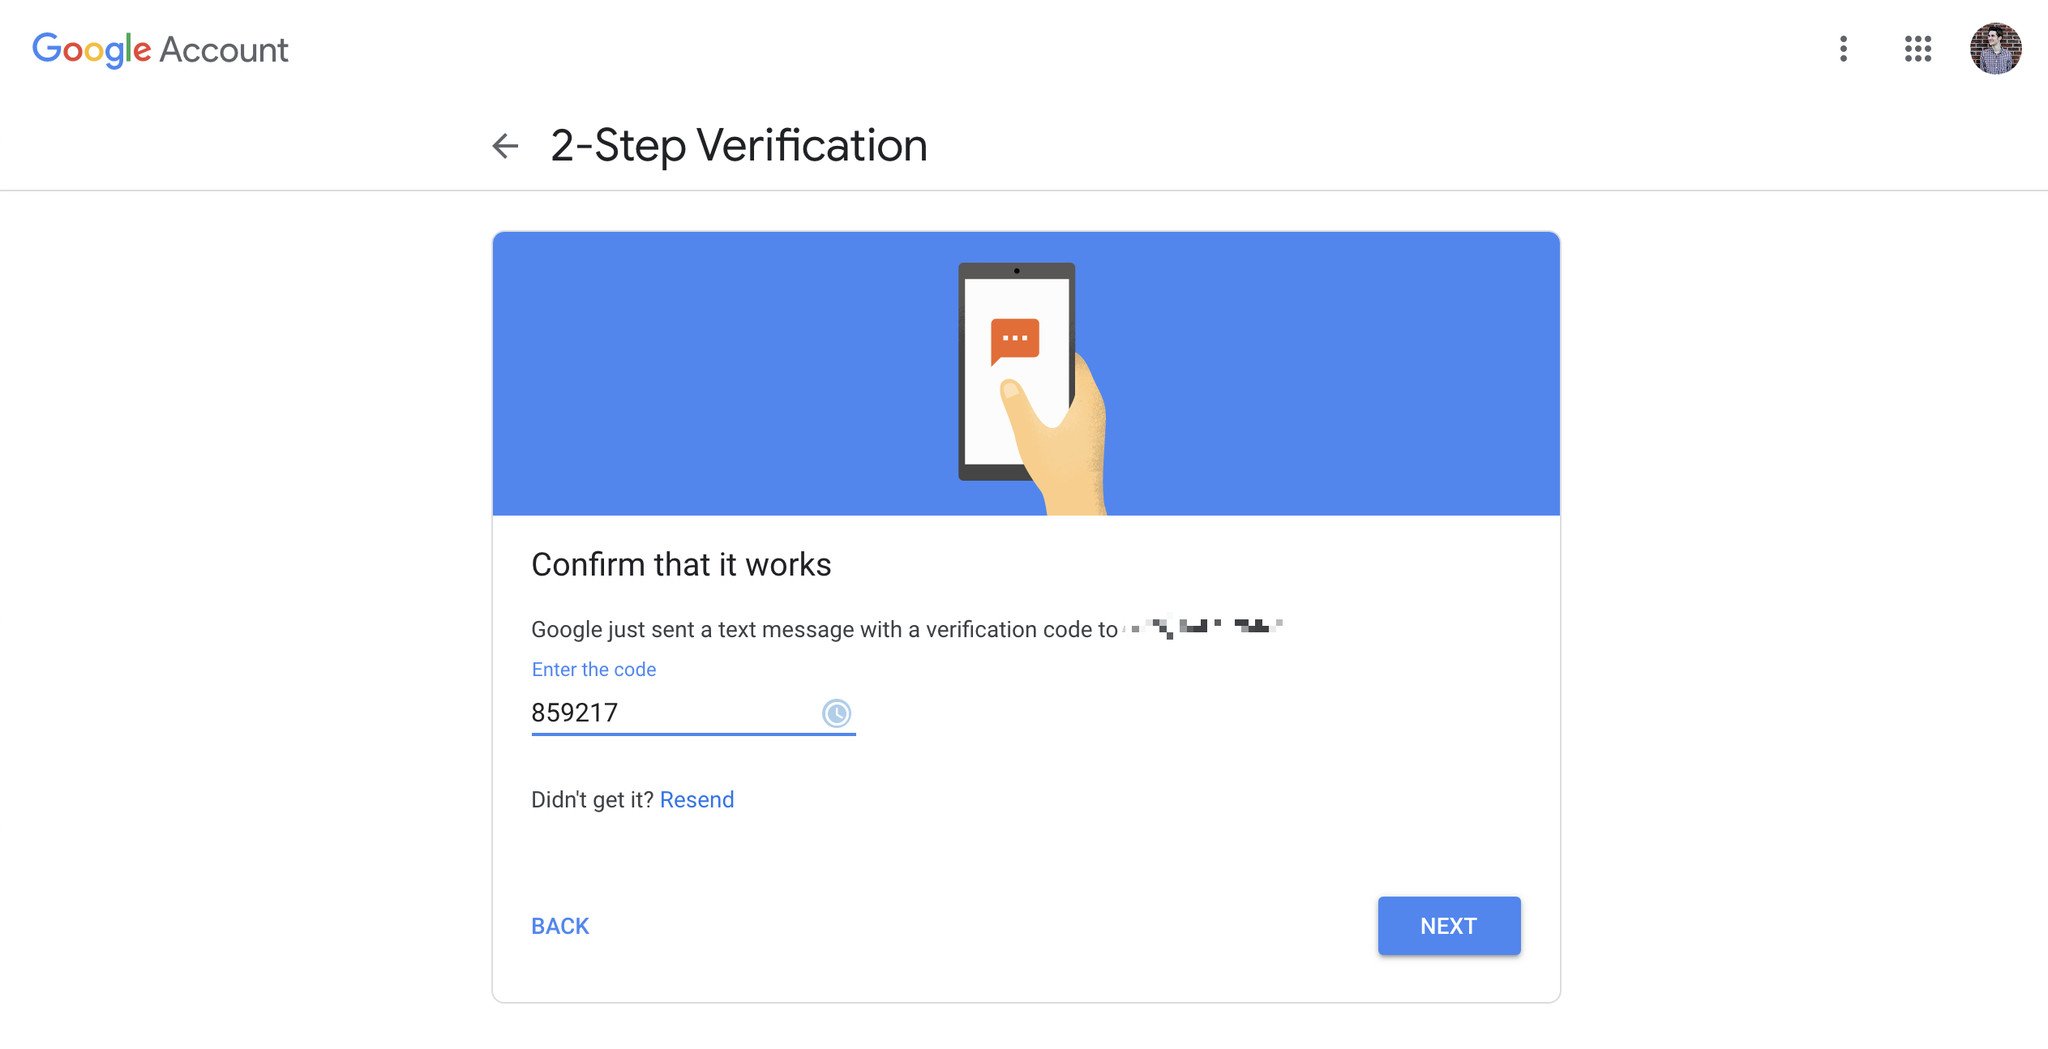
Enter the code that is texted to your number and click Next.
-
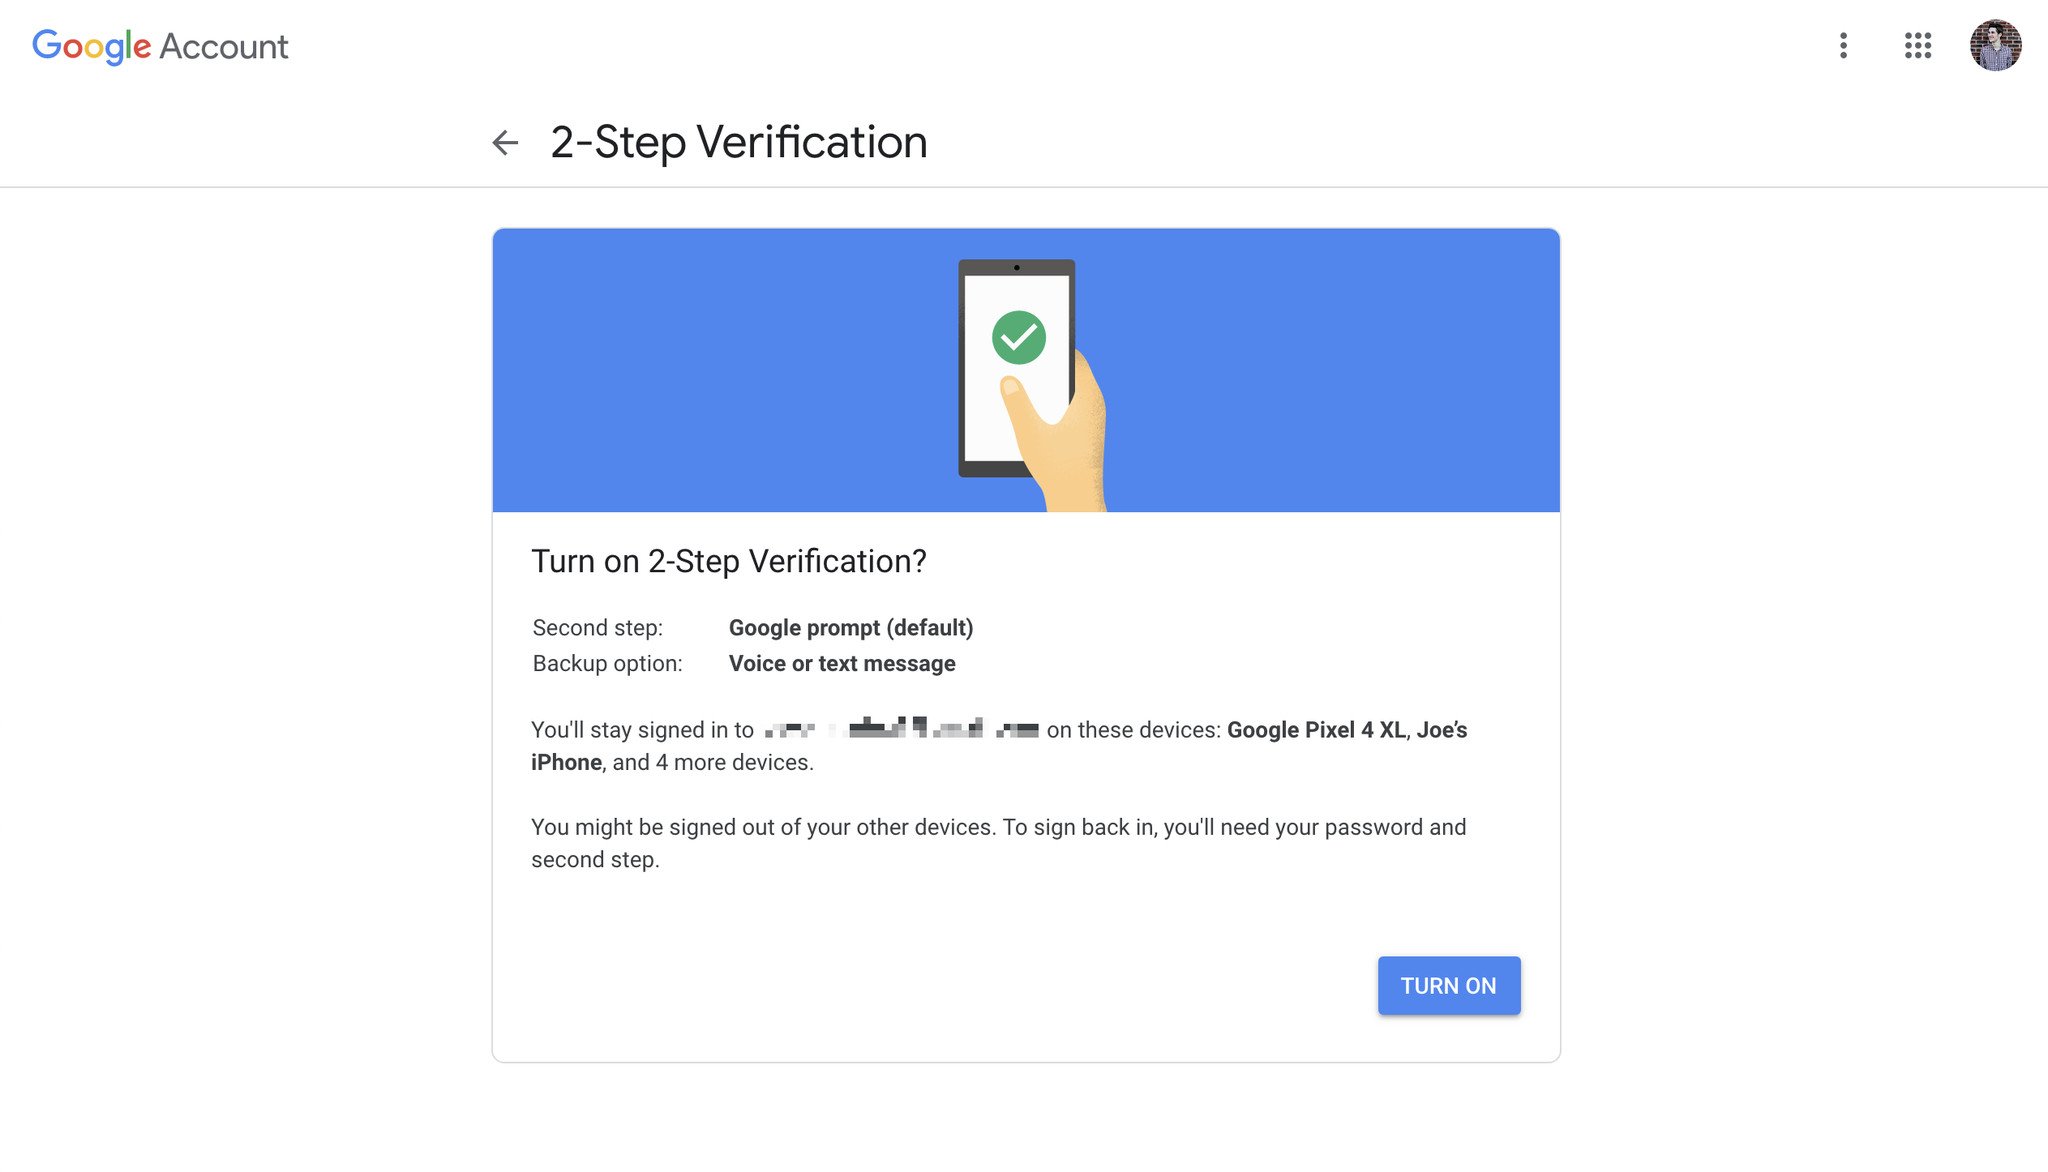
Click Turn On to enable two-factor authentication.
With all of that done, you now have two-factor authentication ready to rock-and-roll on your Google account.
You'll enter only your password like normal when logging in to trusted devices, but if you get a new phone or try to log in on a public computer, be prepared to have your phone on hand to confirm the Google Prompt.
How to set up Google Authenticator two-factor authentication
While the default Google Prompt is likely the best choice for most folks, you can also set up two-factor authentication with Google's Authenticator app. This is a free app that's used to generate random codes for your two-factor login, and along with your Google account, it can be used with any other app/website that supports two-factor apps.
Eager to start using this? Here's what you need to do.
-
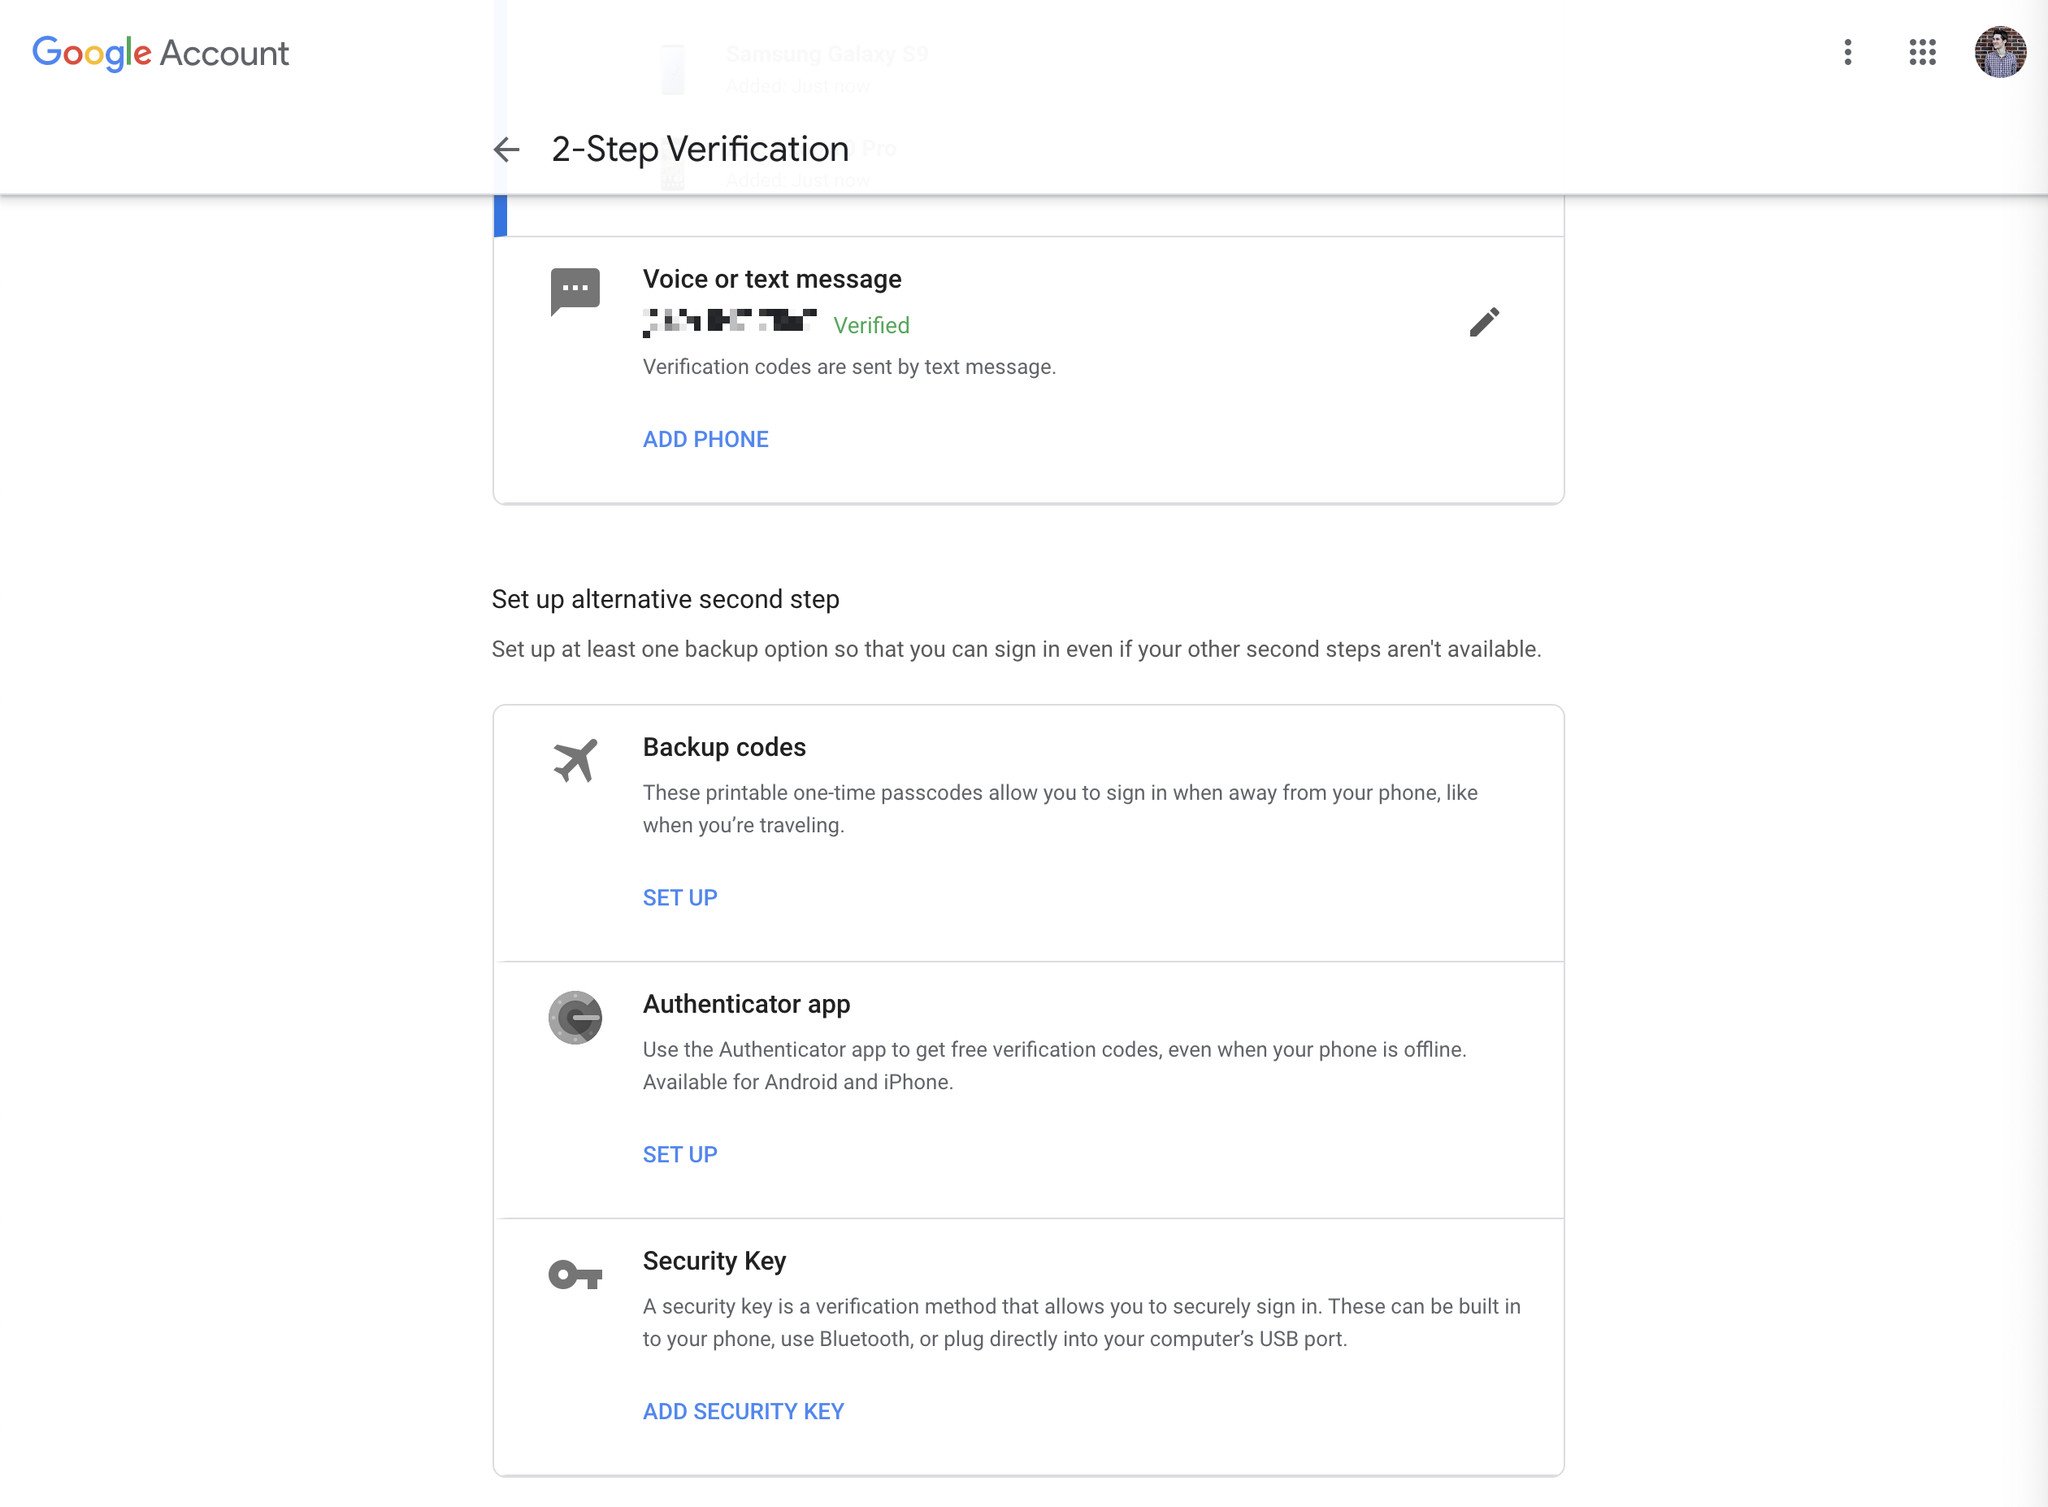
On the 2-Step Verification page we were just on, scroll down and click Set Up under Authenticator app.
-
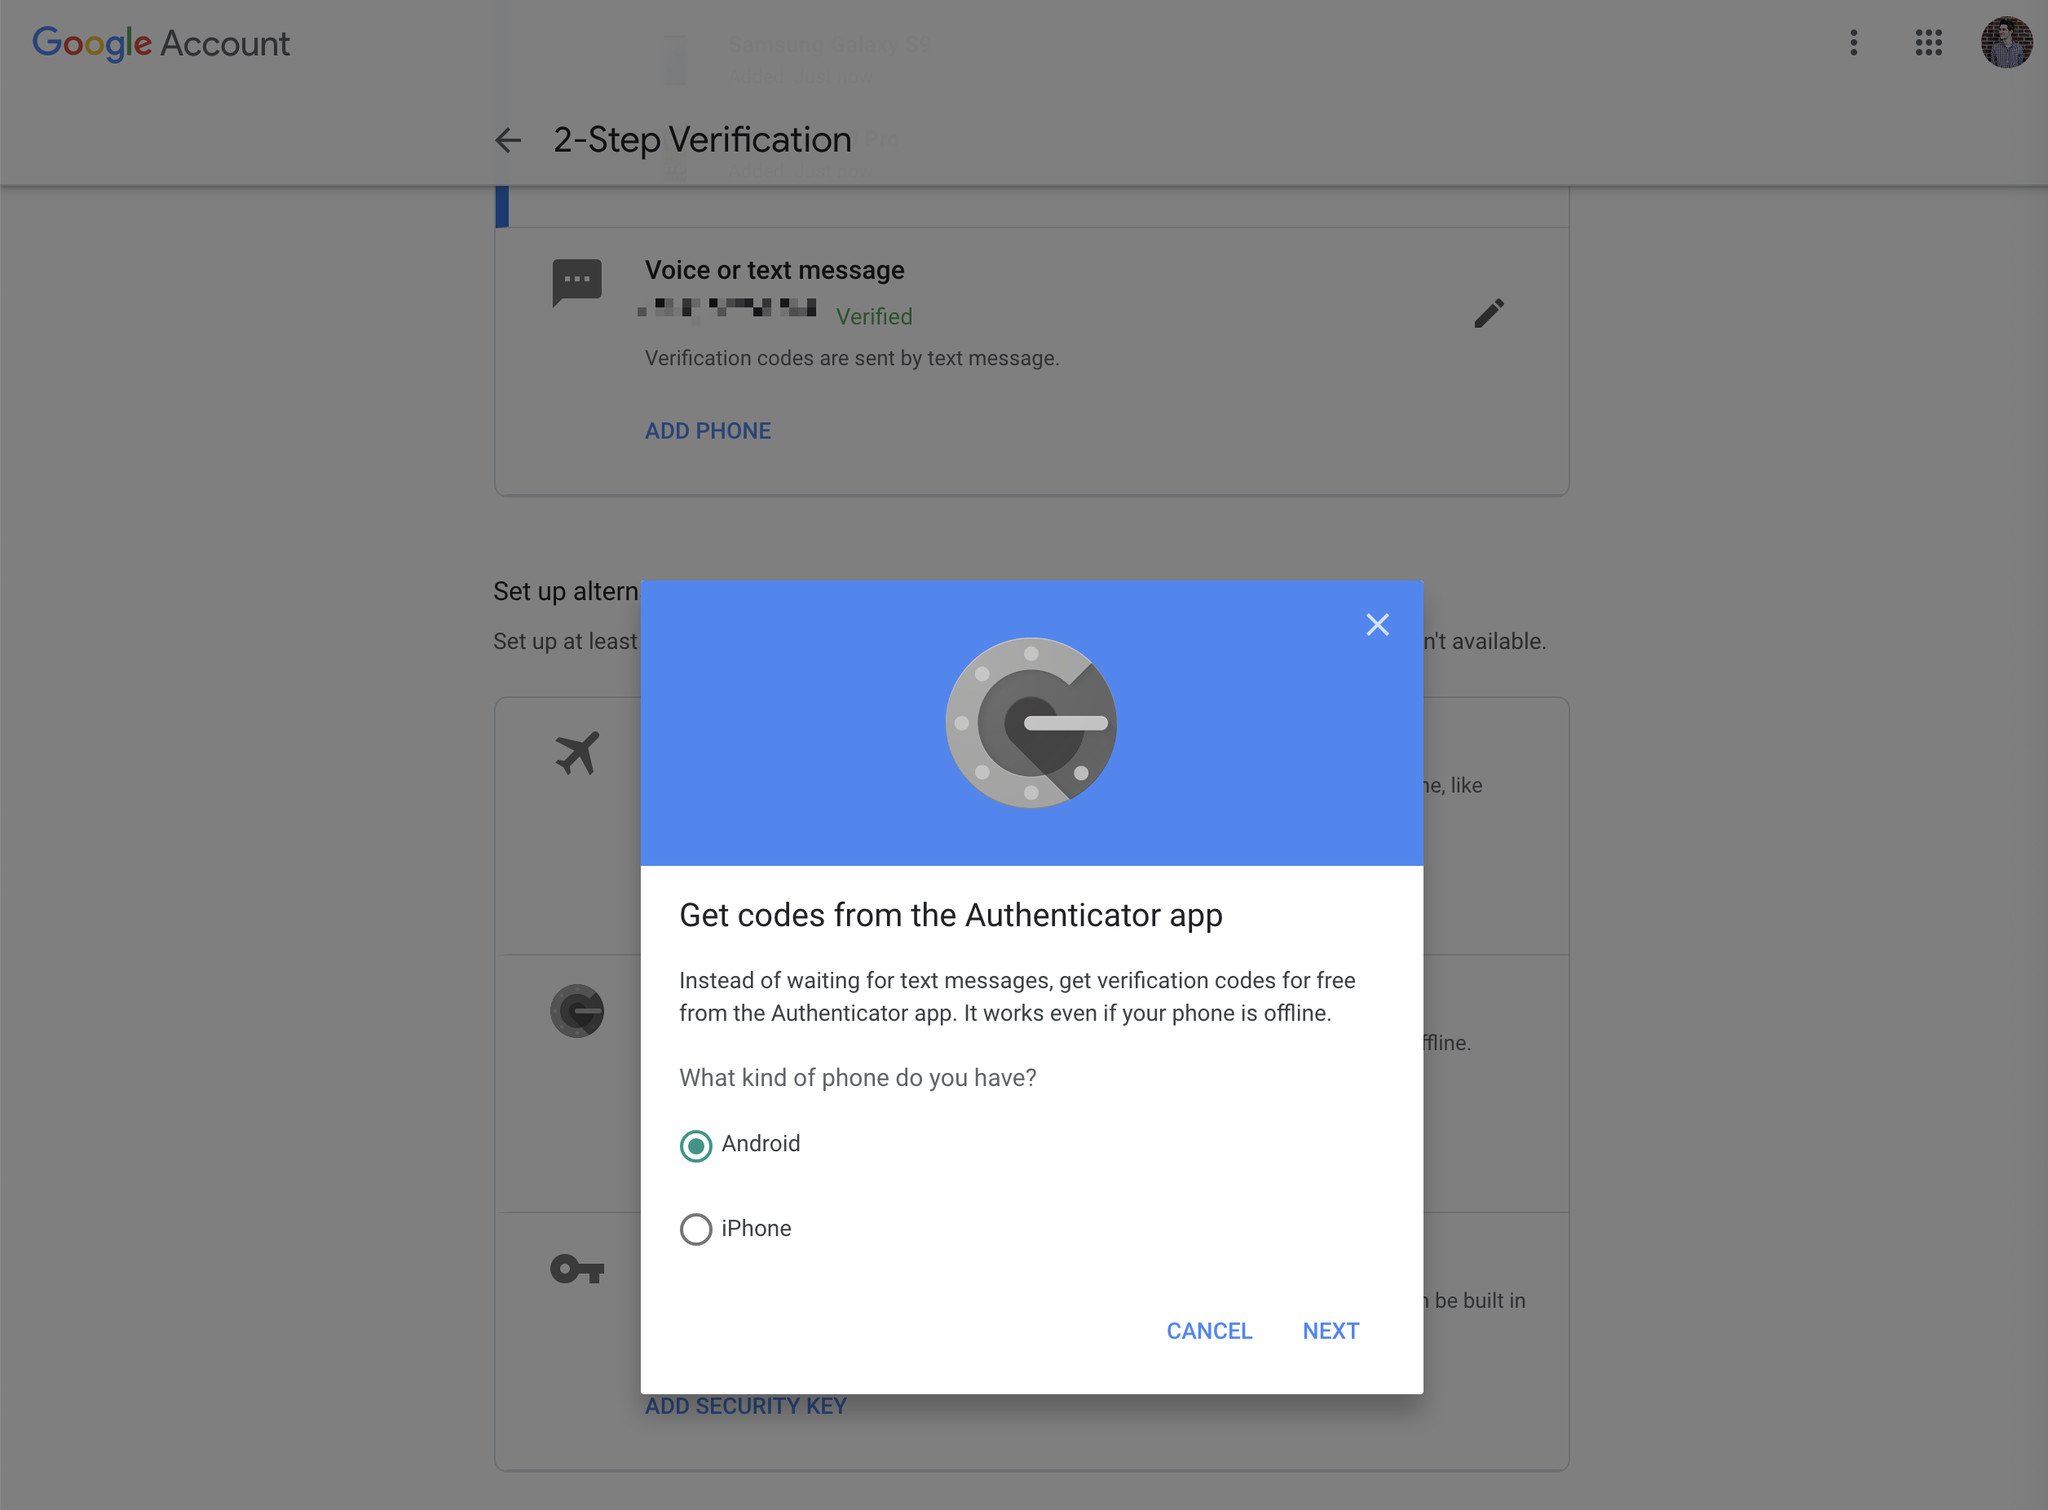
Choose which phone you have and click Next (we're using Android for this example).
For this next part, we're moving away from the desktop and heading to our Android phone.
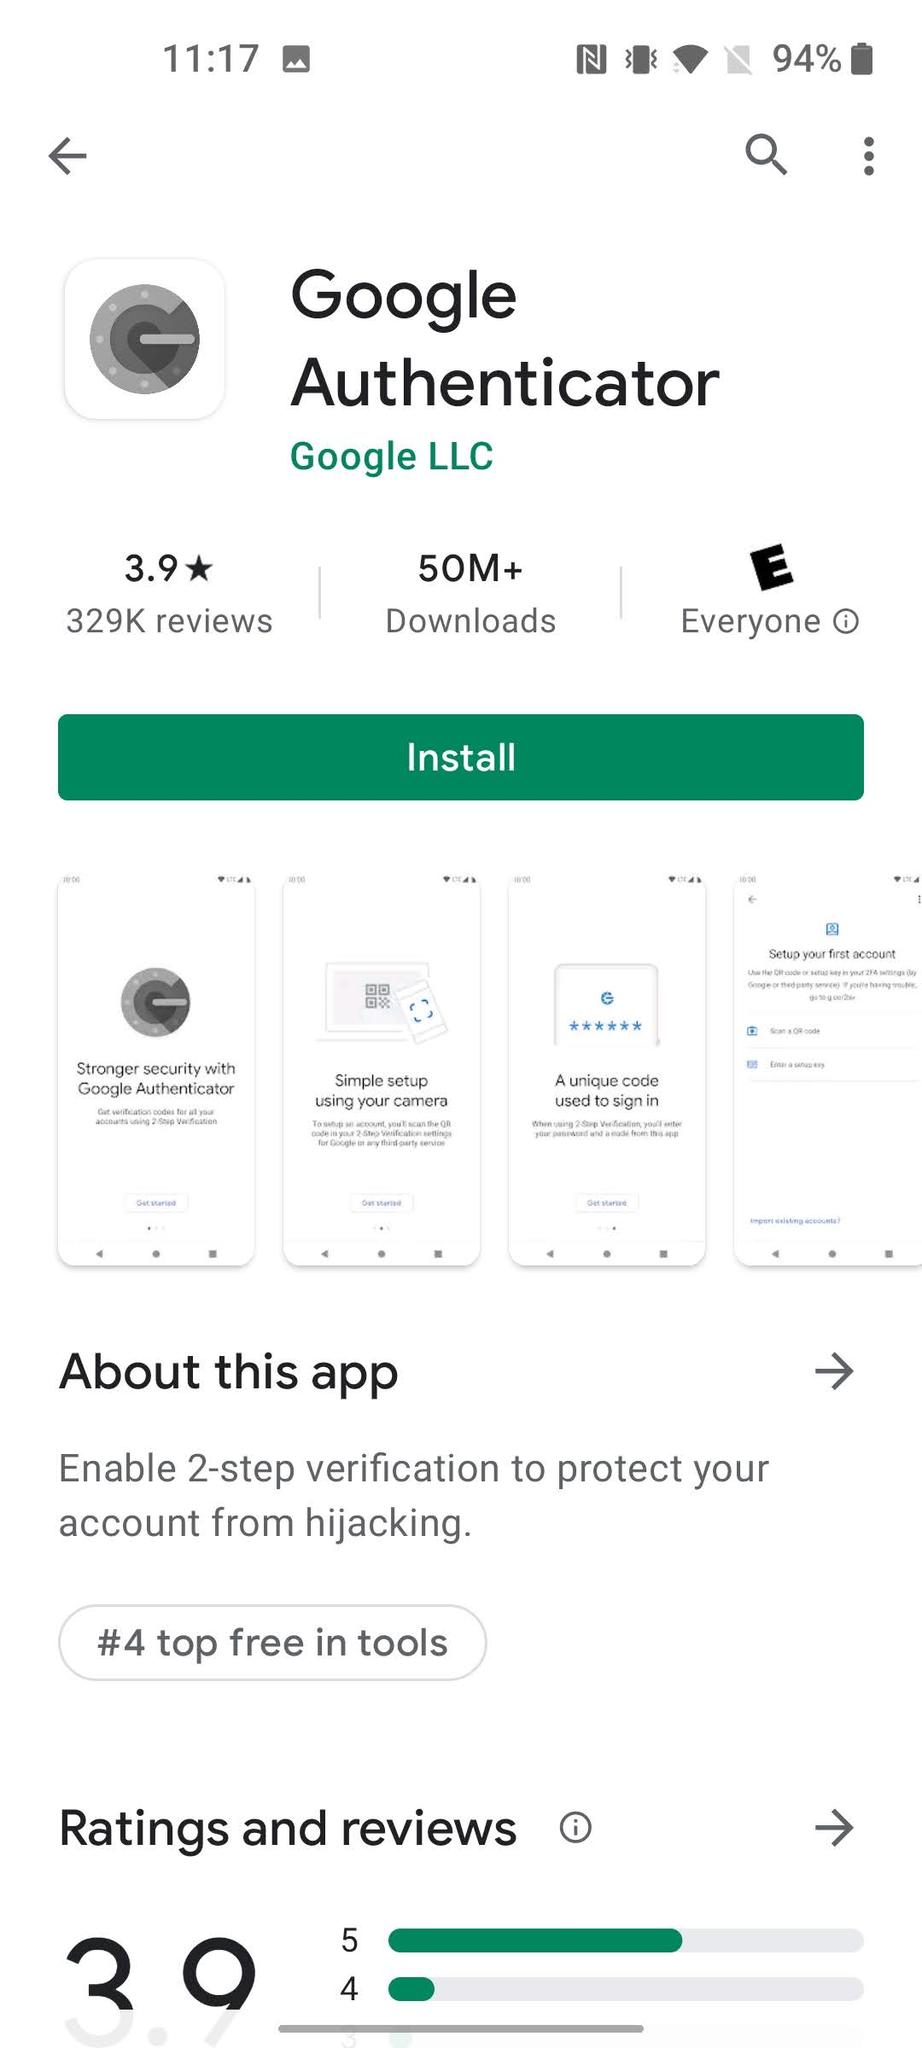
- Open the Google Play Store.
- Search "Google authenticator."
-
Tap Install.
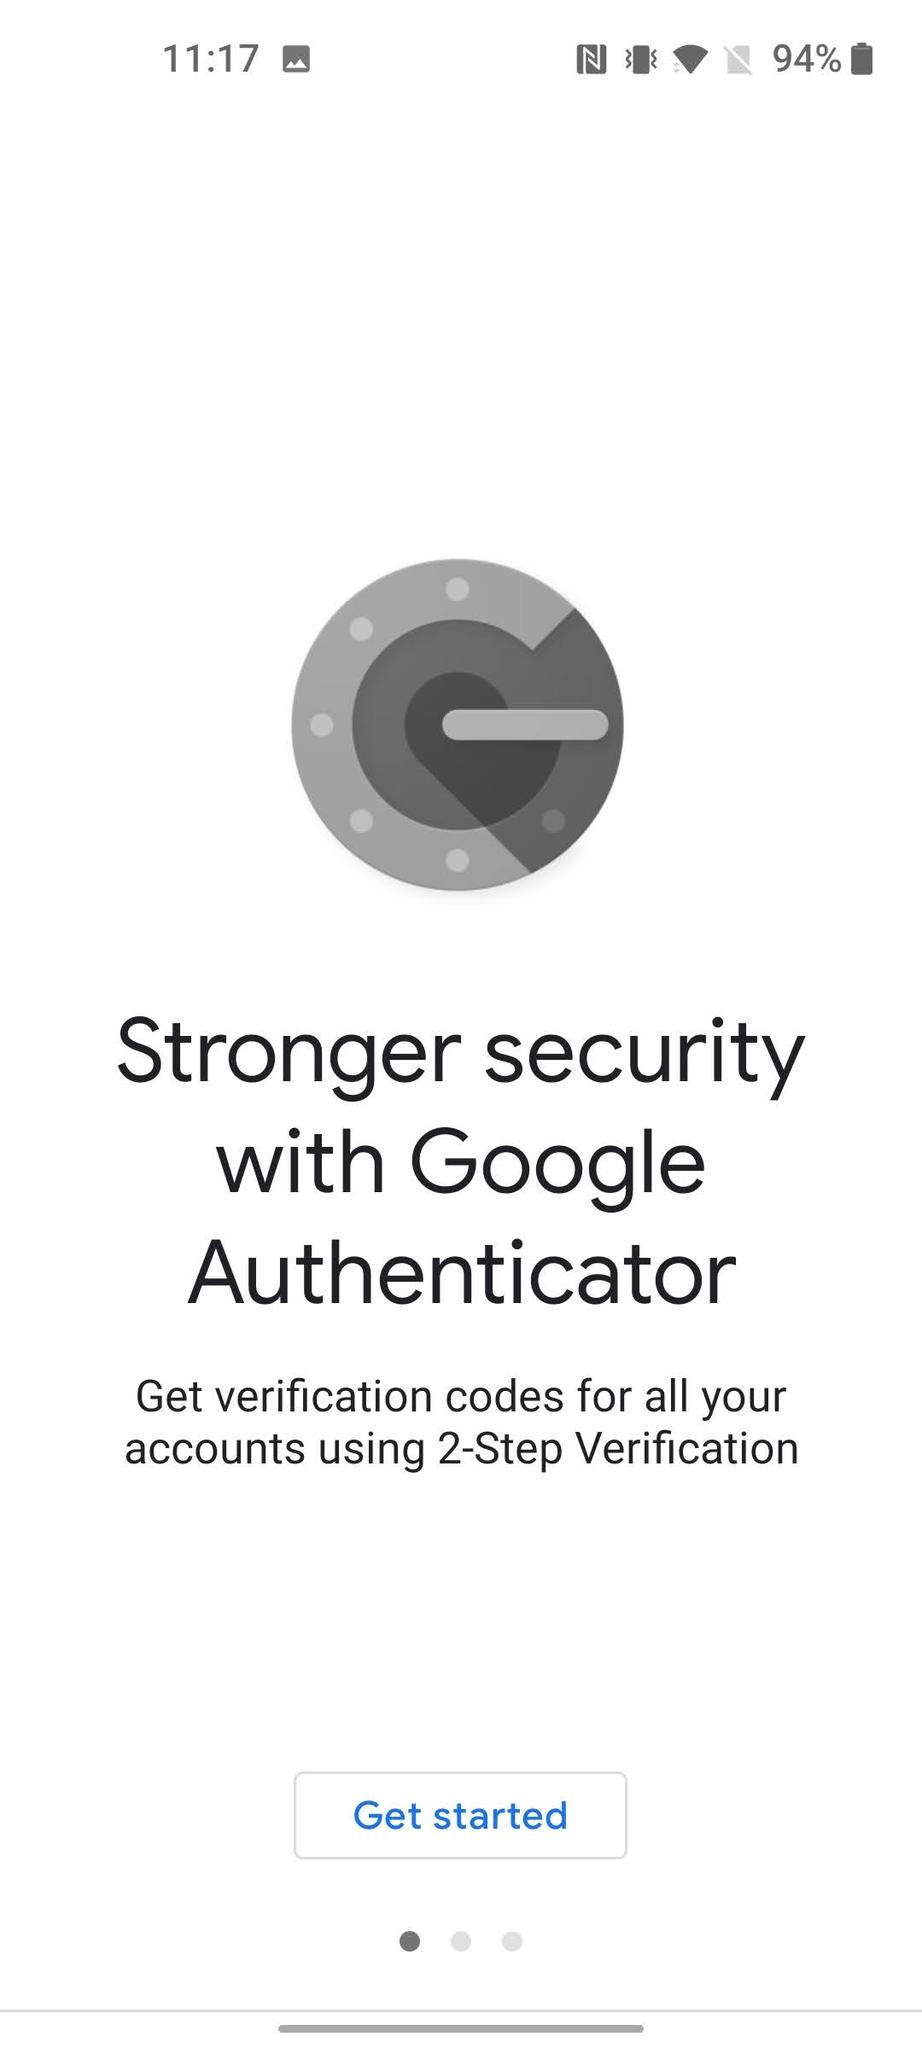
- Open the app and tap Get started.
- Tap Skip at the bottom left.
-
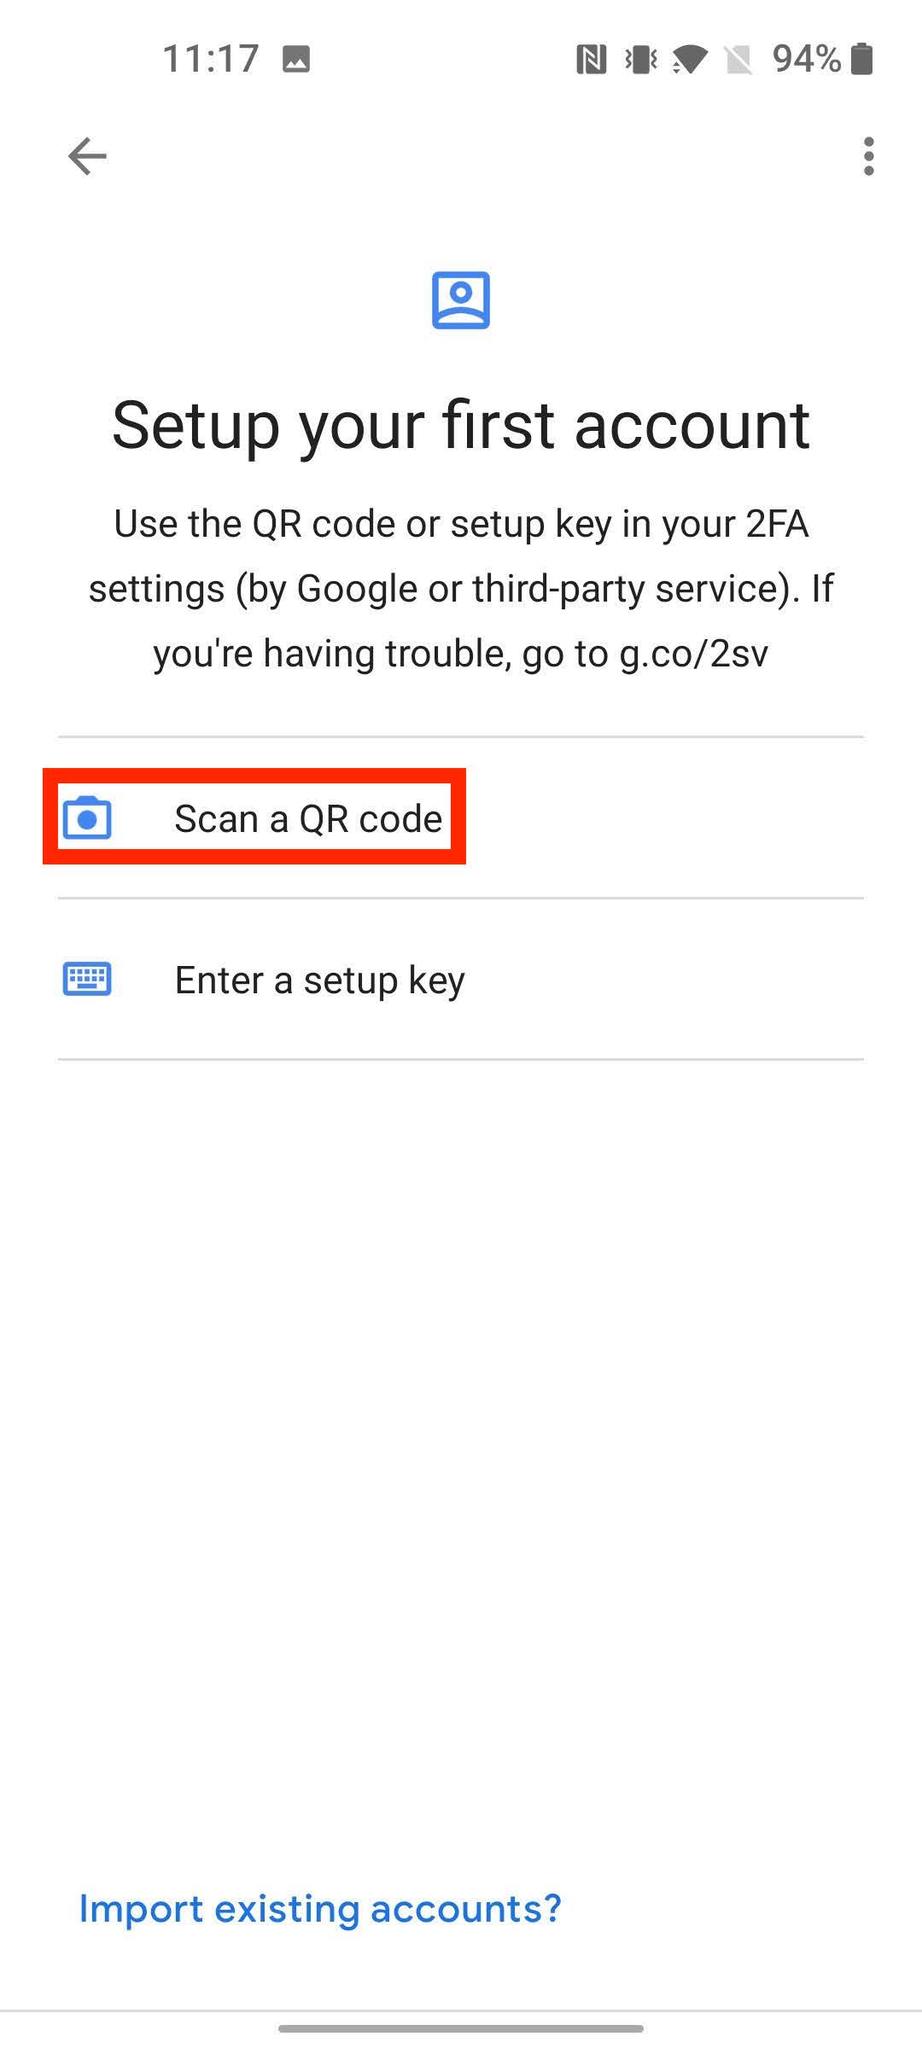
Tap Scan a QR code.
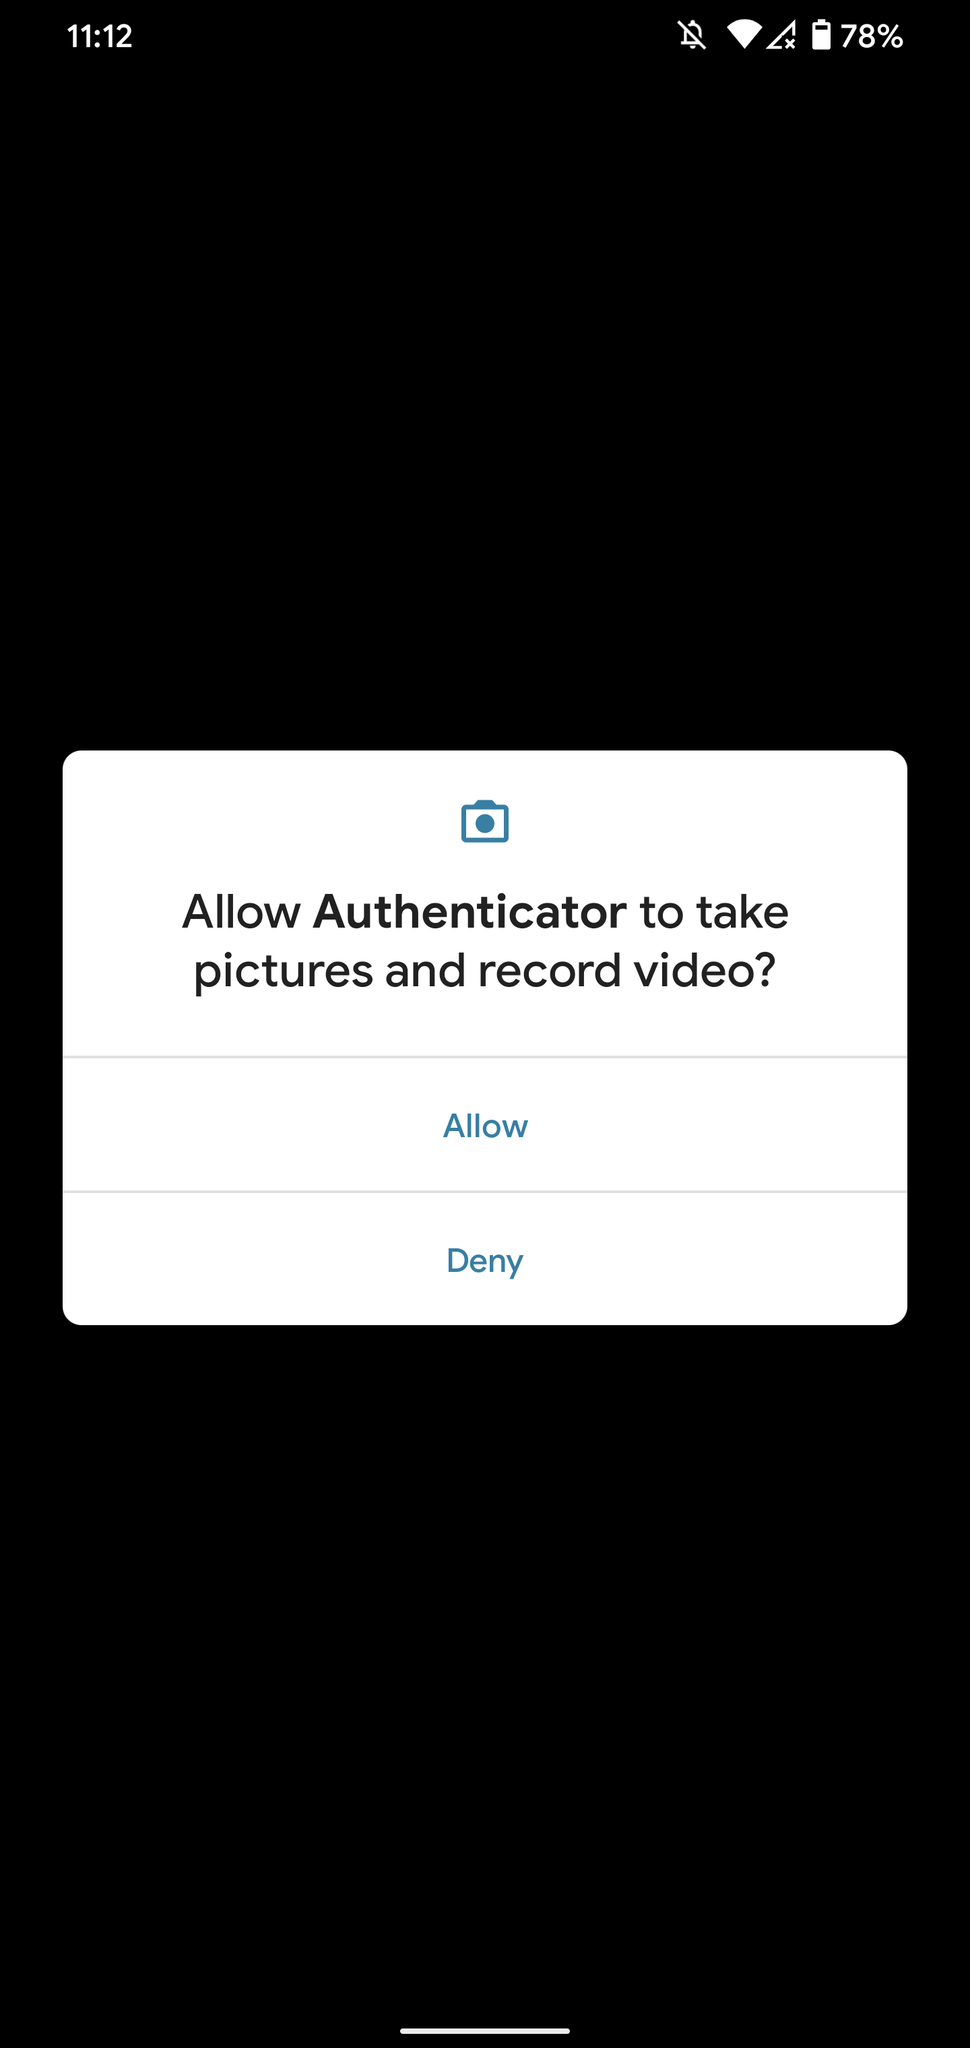
- Tap Allow to grant camera access.
-
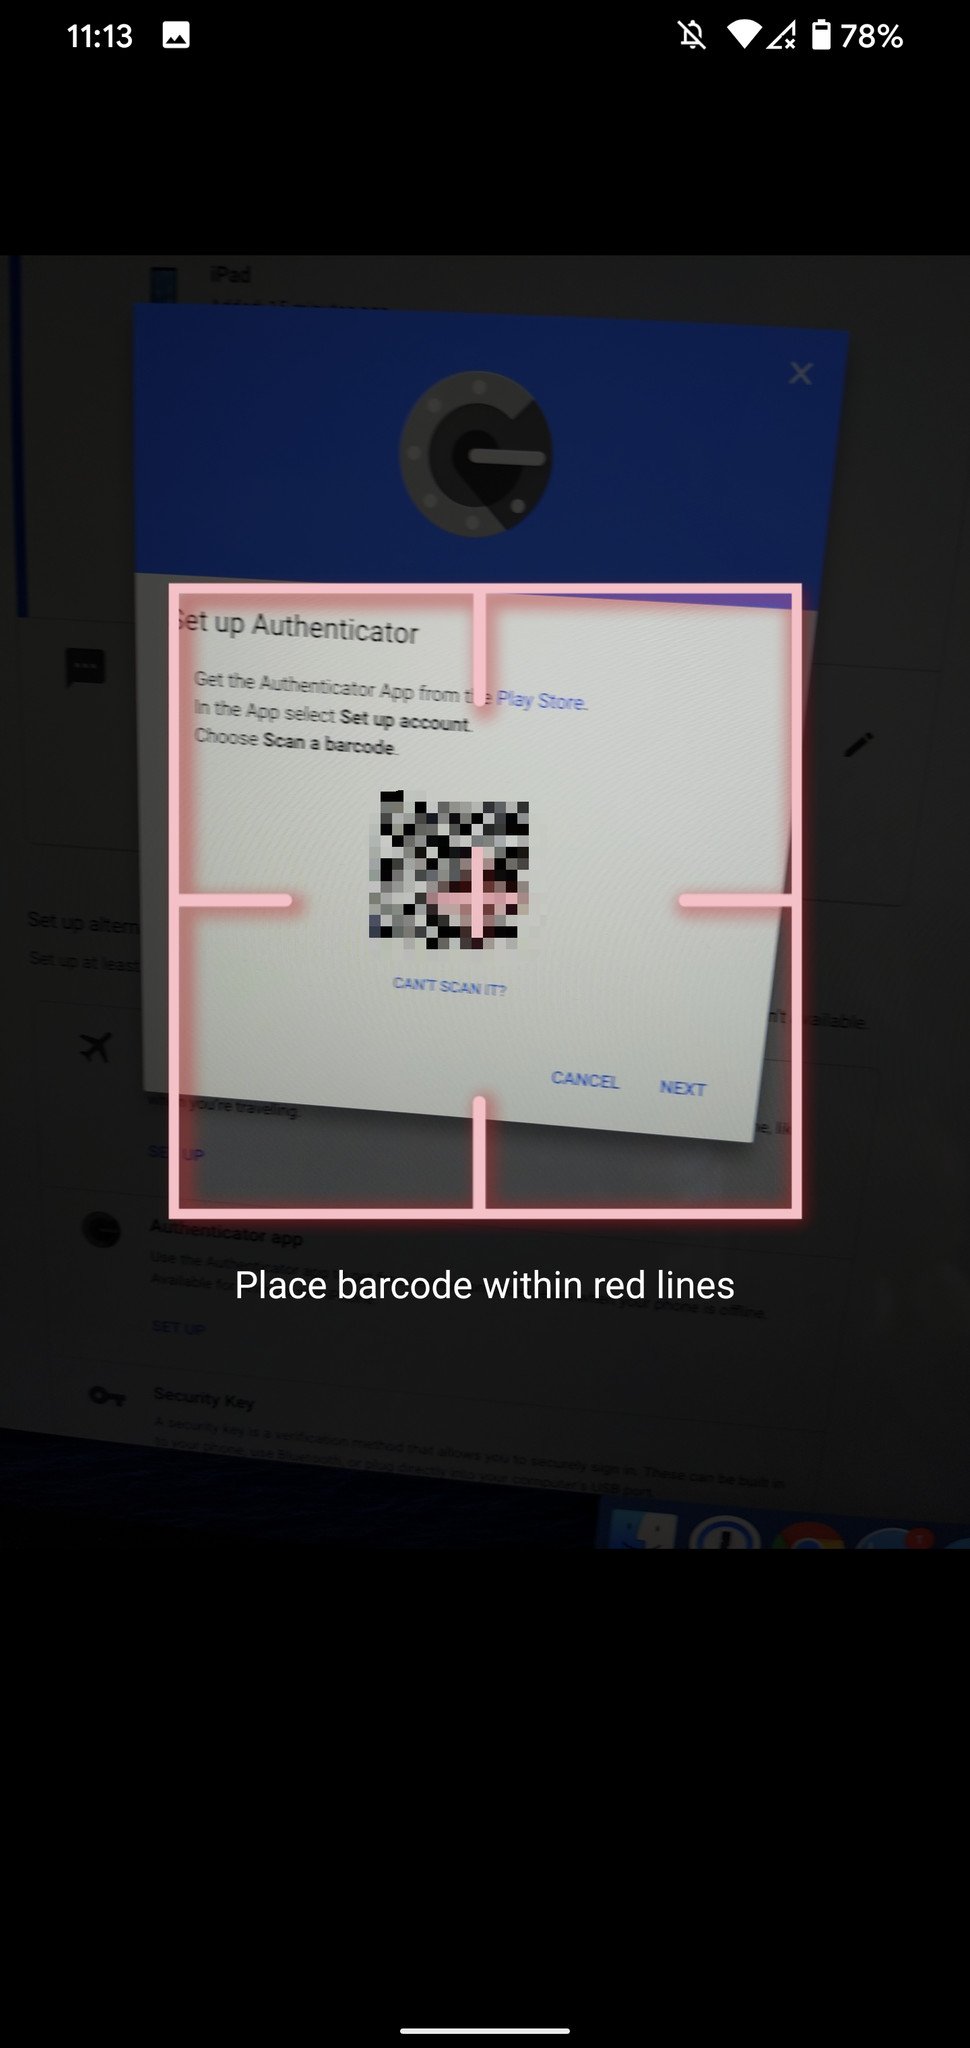
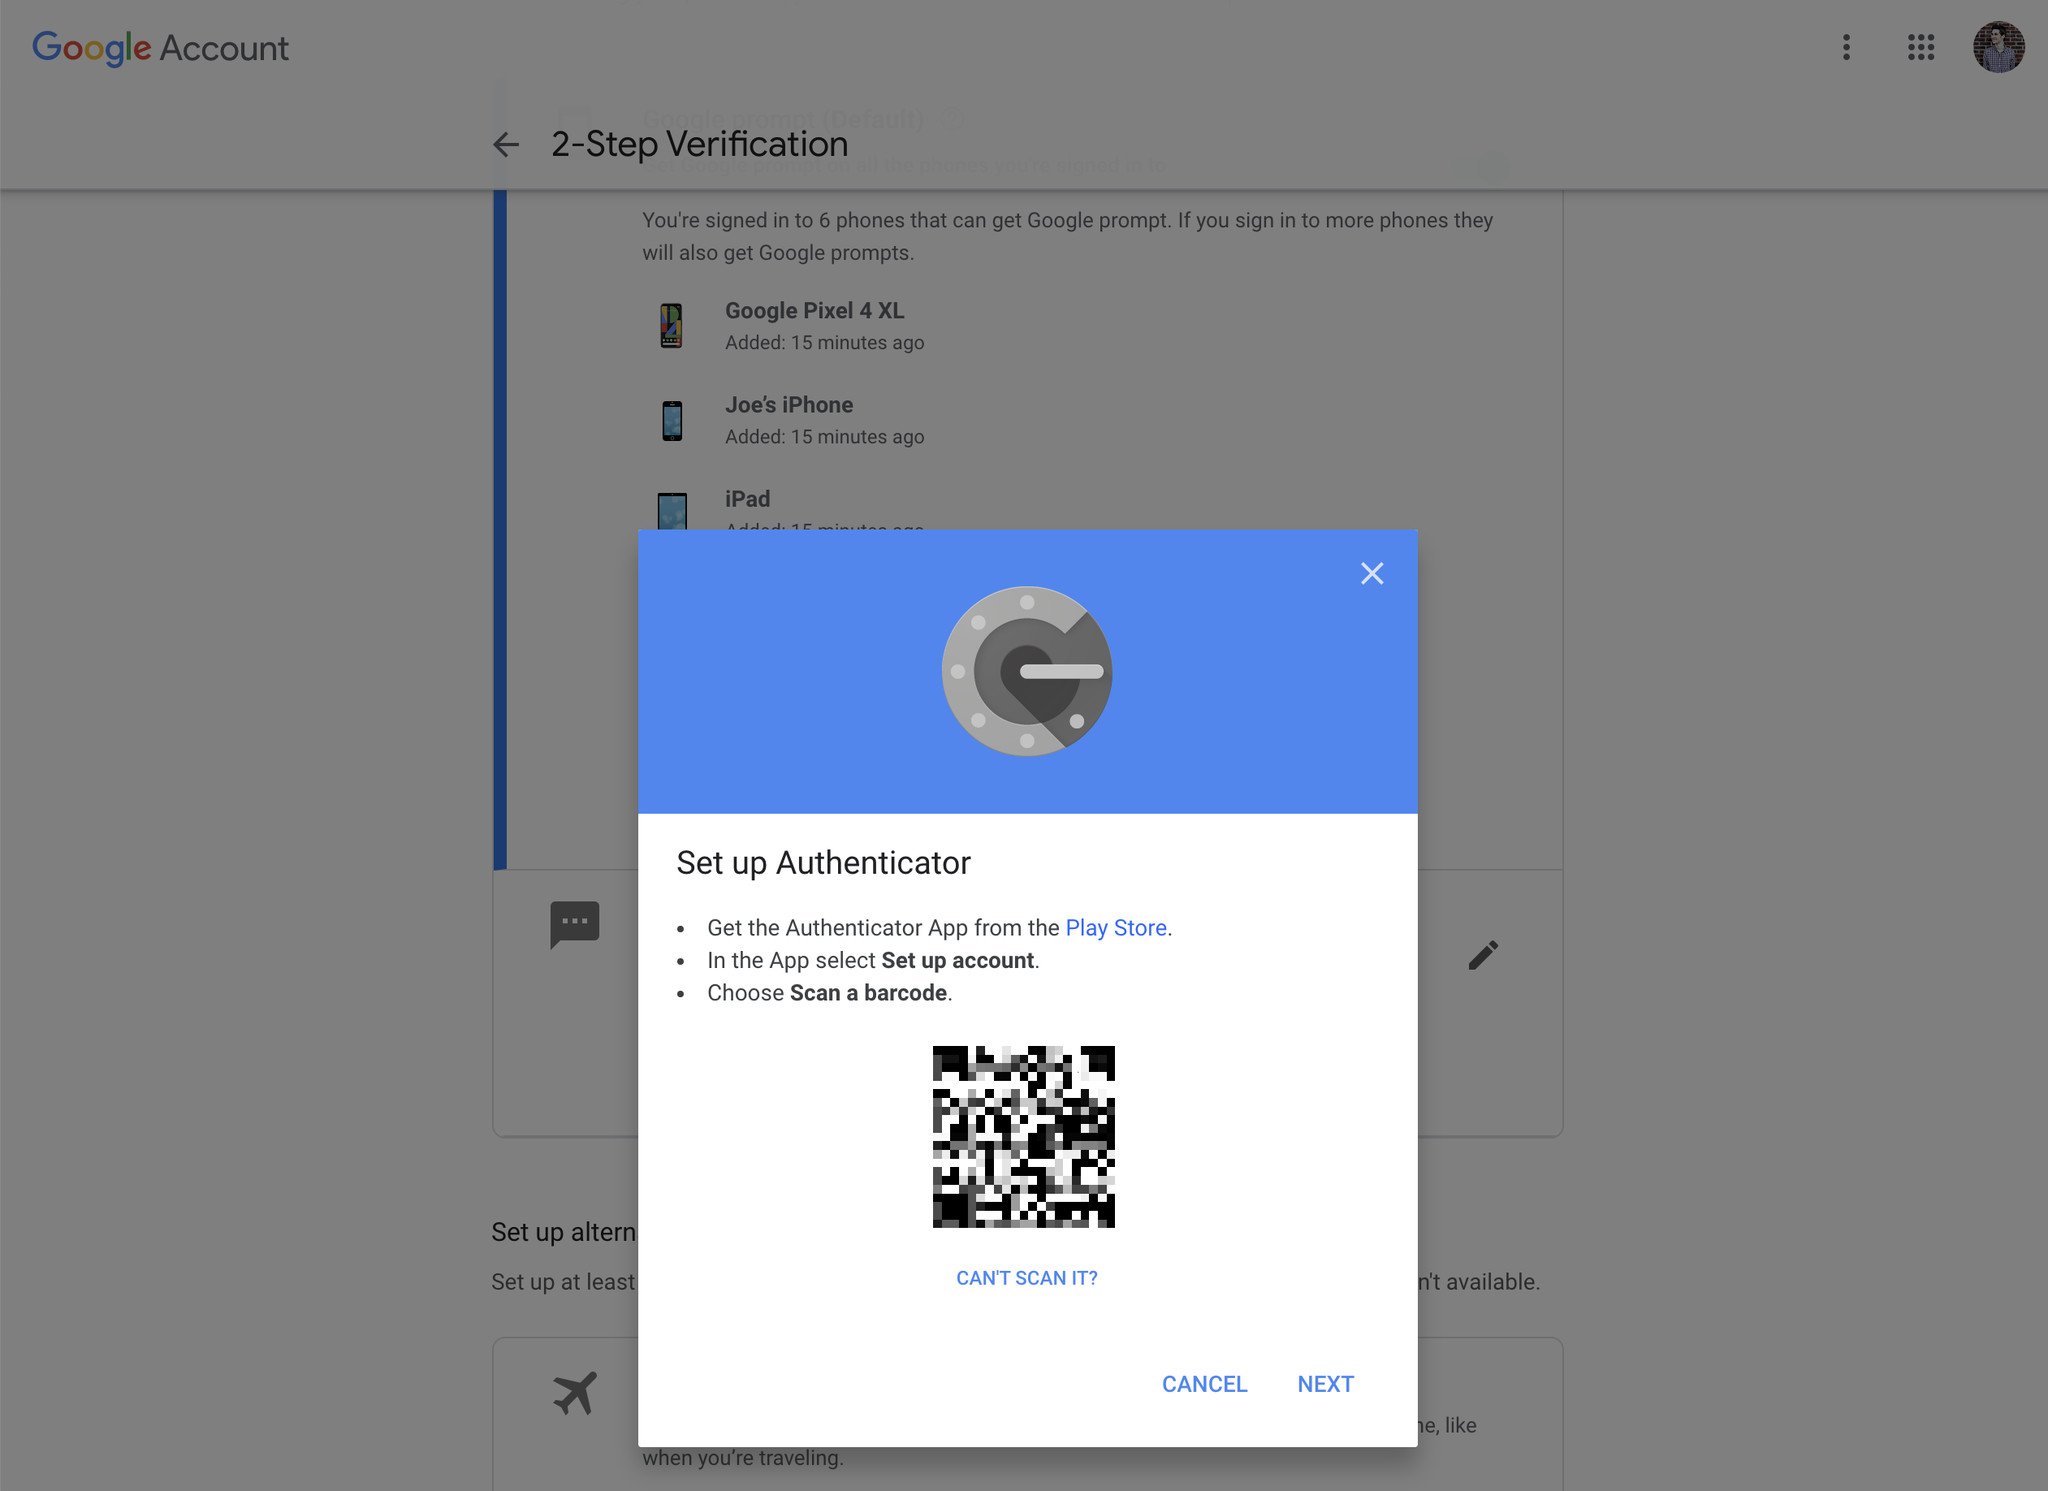
Scan the barcode.
Lastly, we move back to your computer to finalize everything.
-
Click Next.
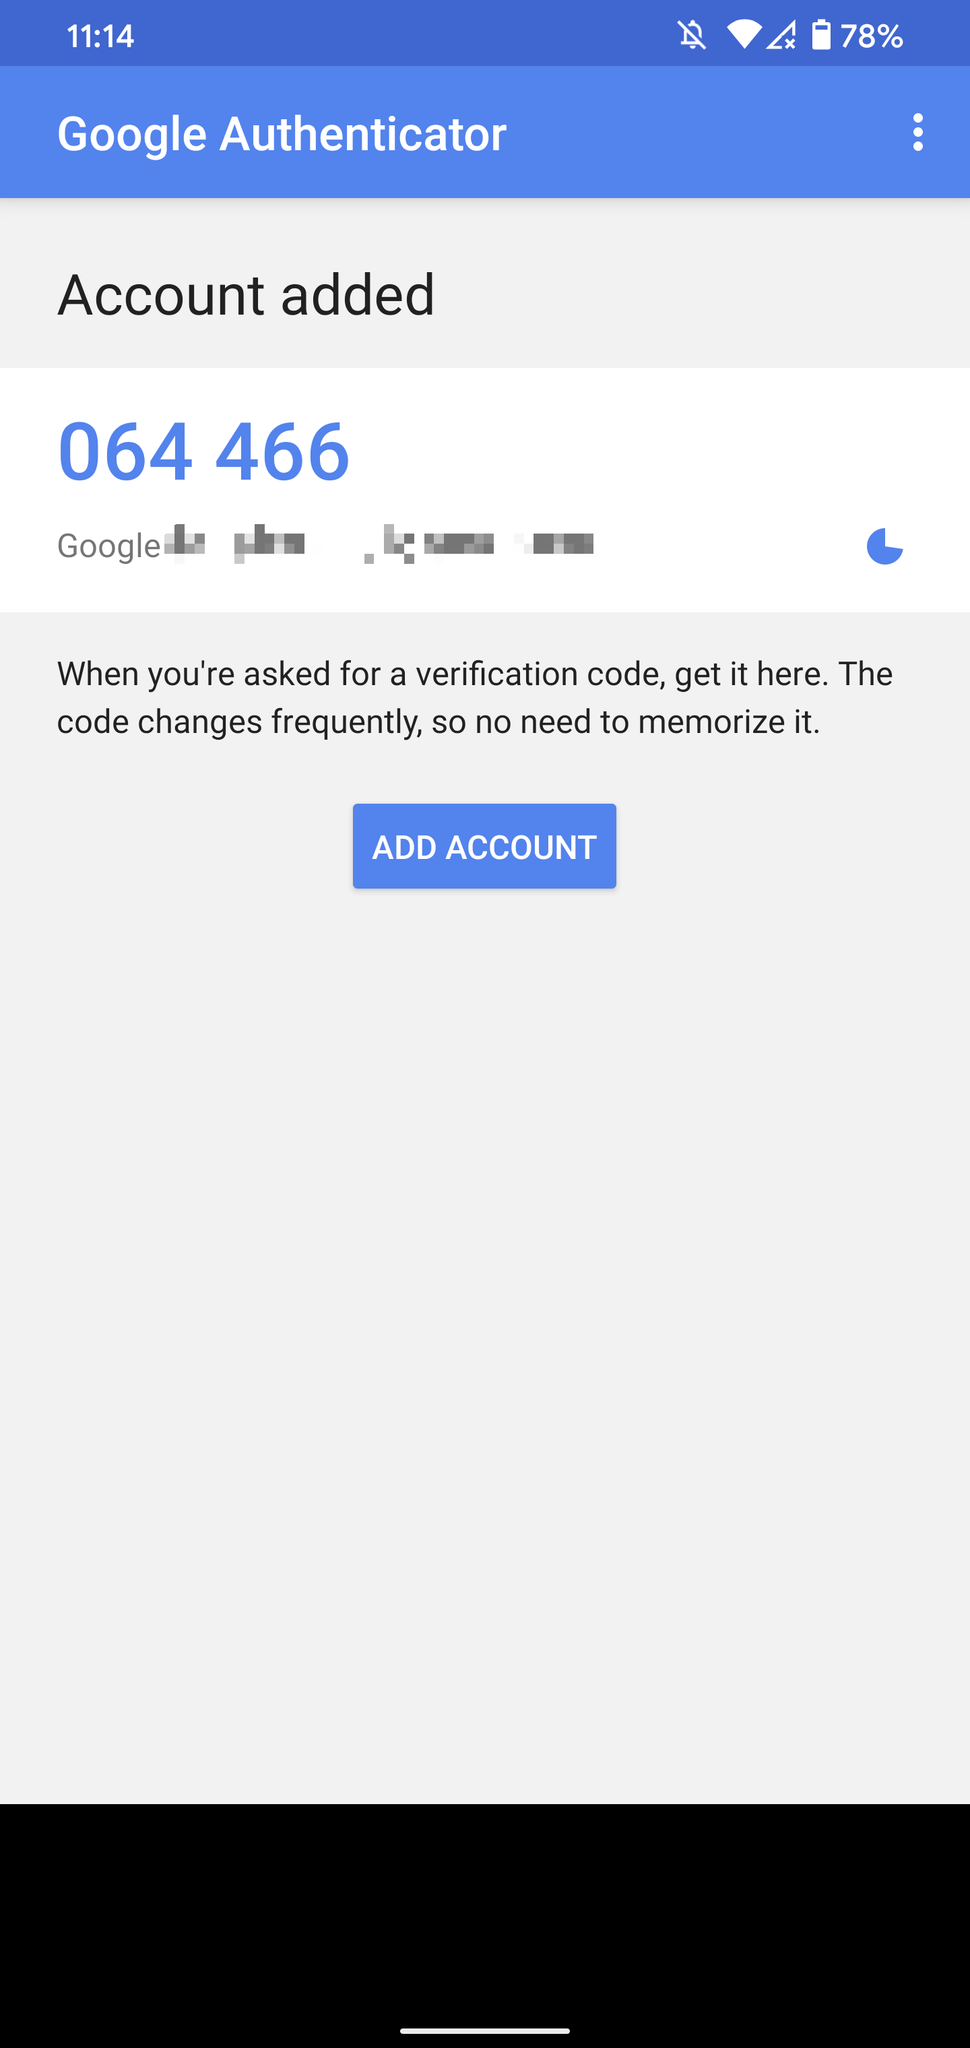
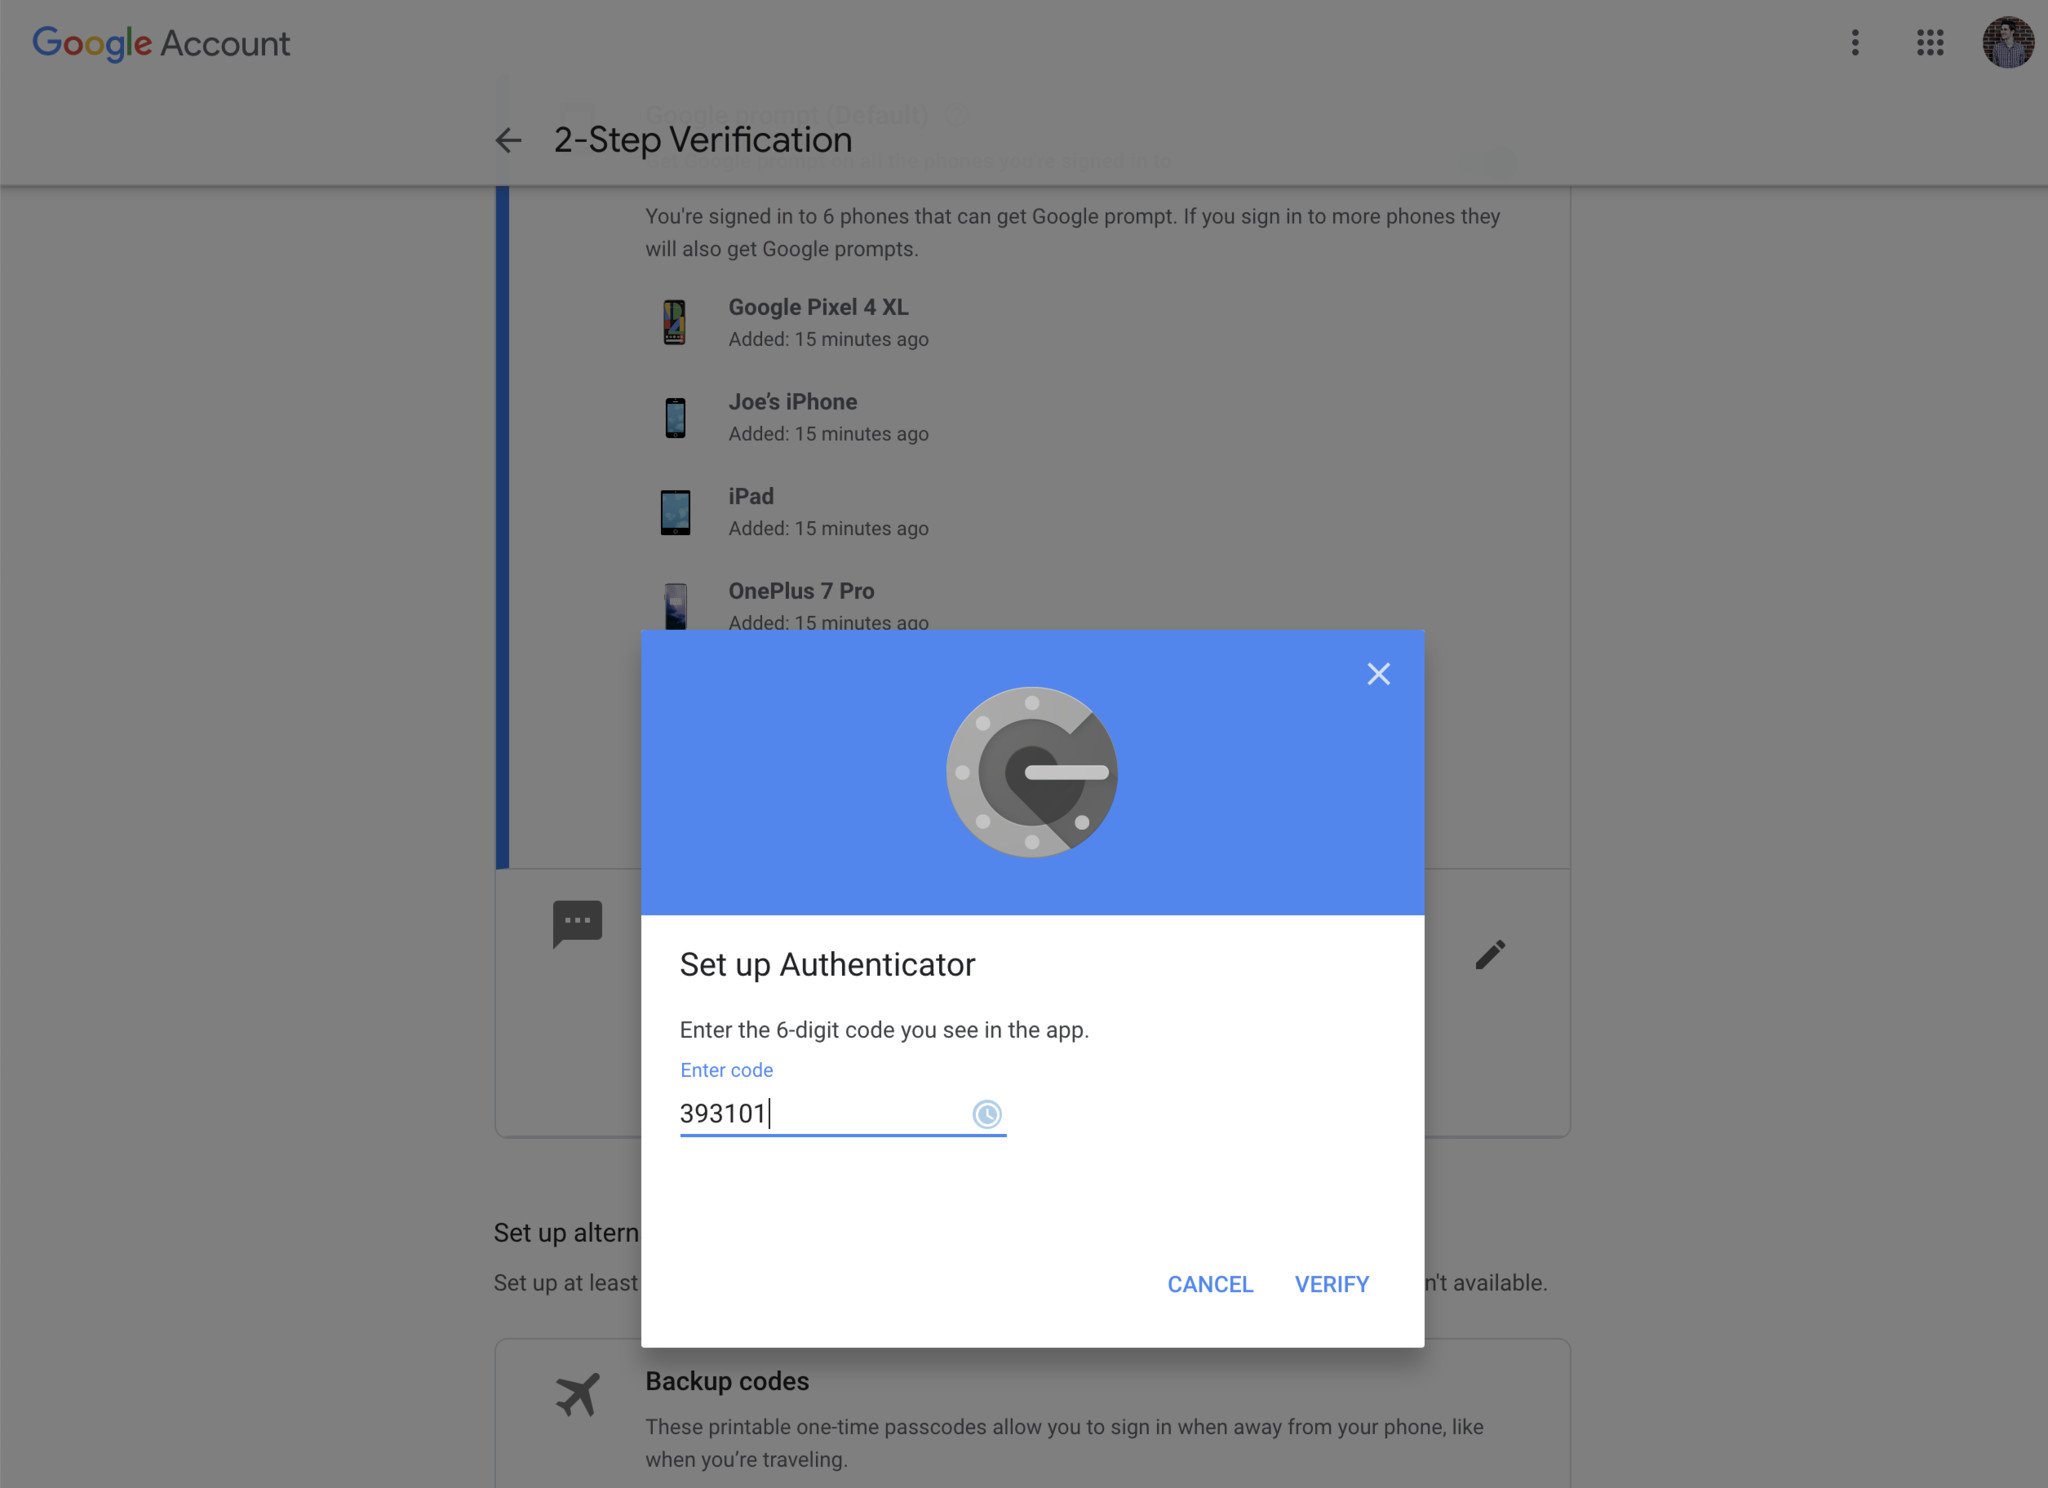
- Enter the code shown on the Google Authenticator app on your phone.
-
Click Verify.
-
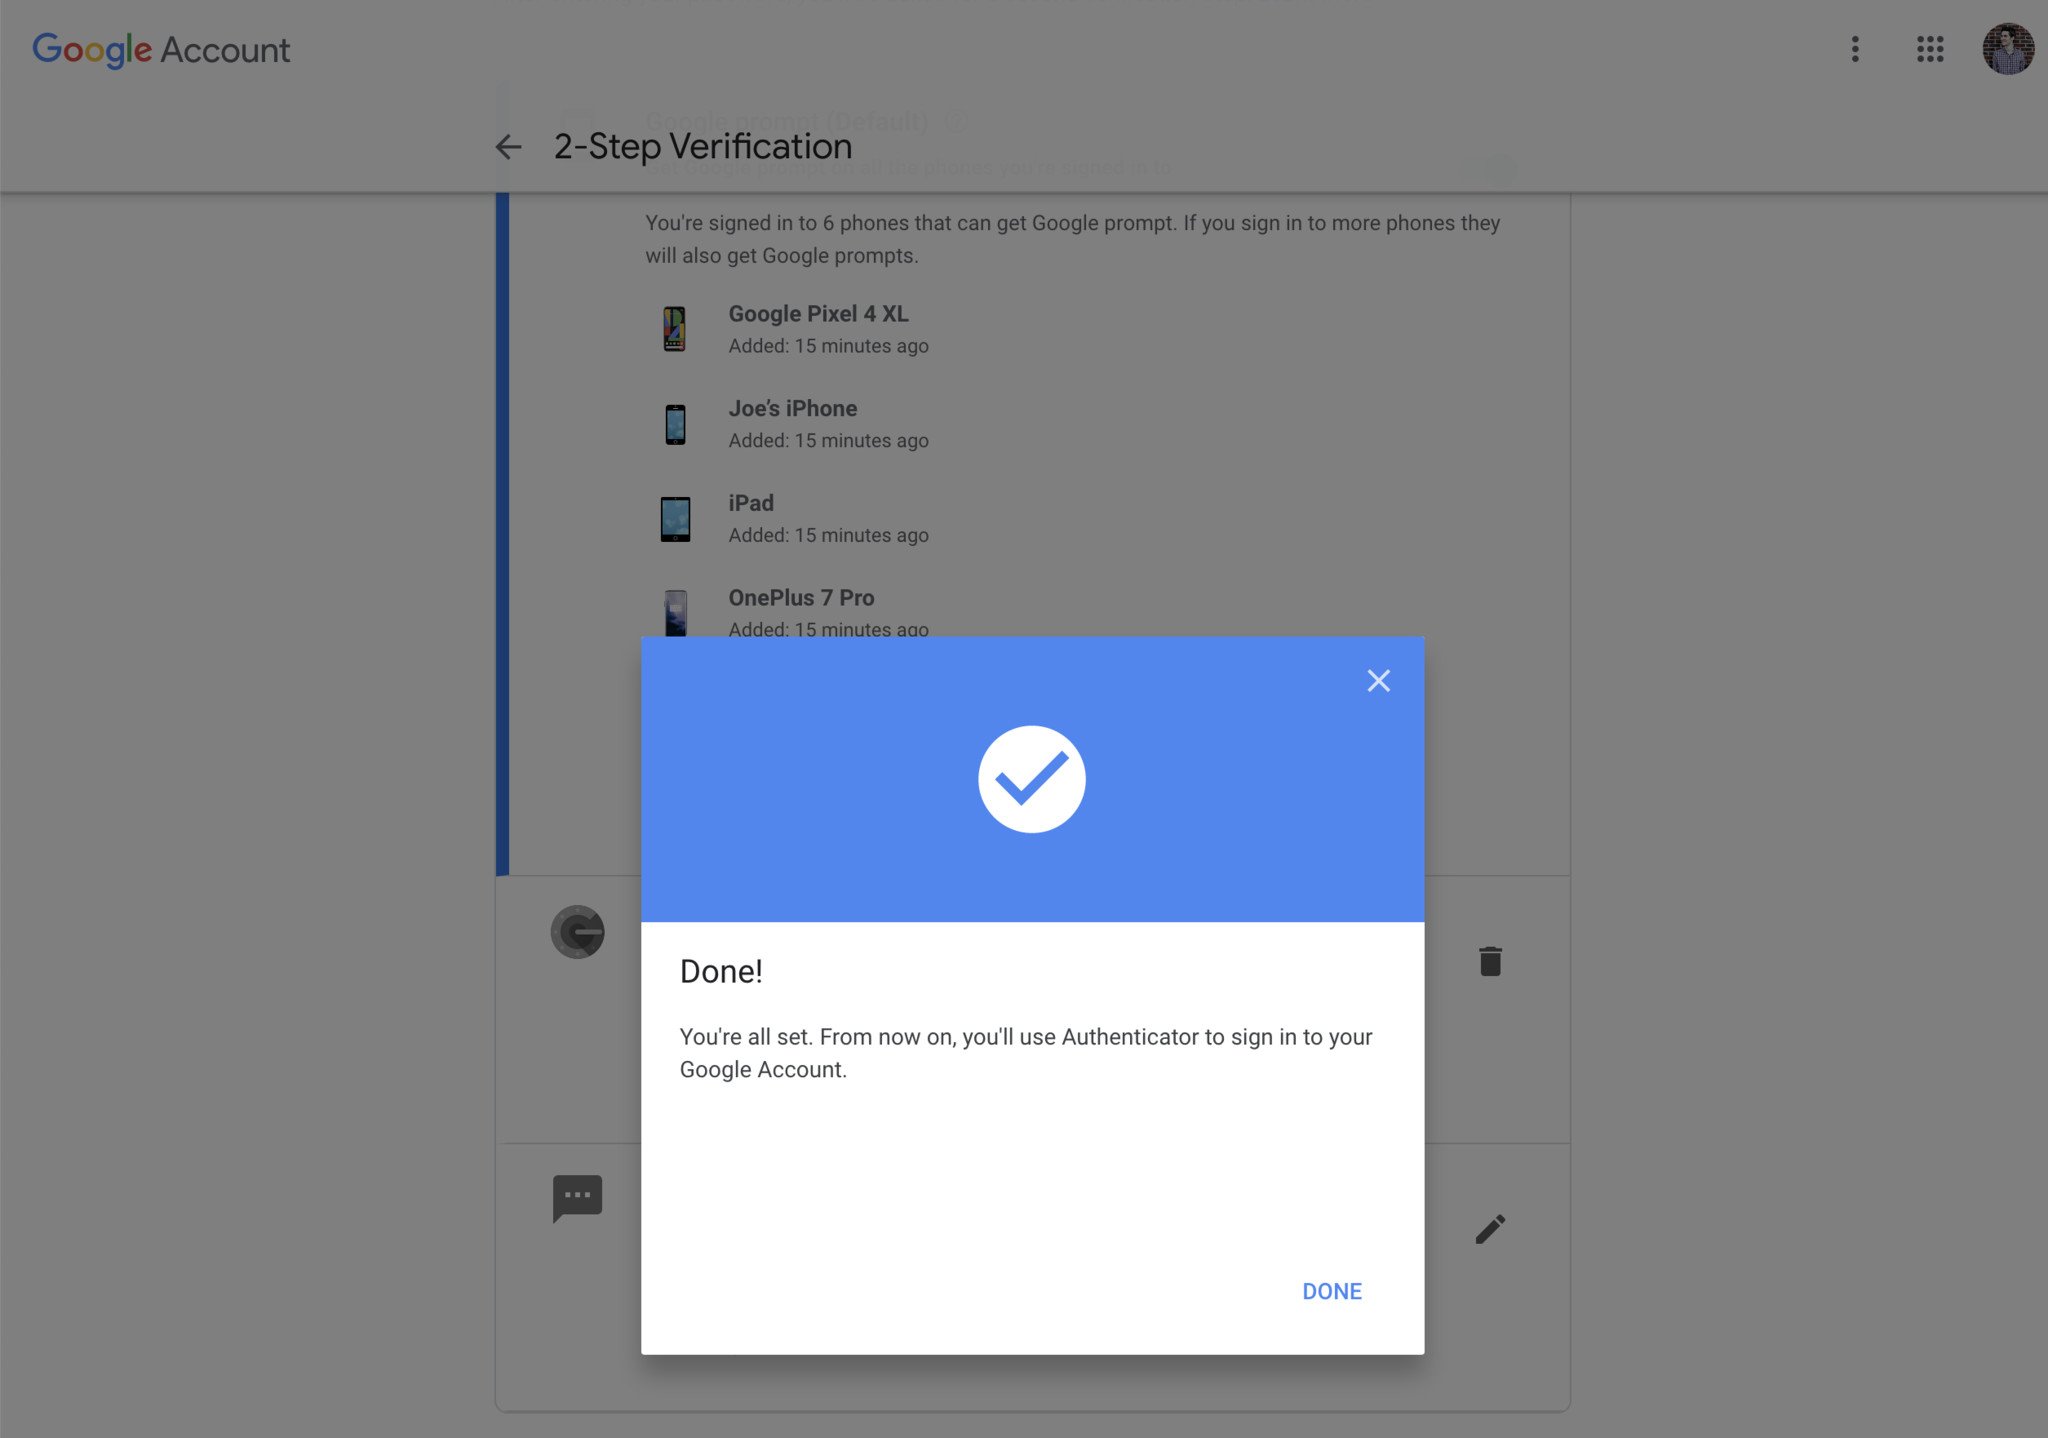
Click Done.
That's it!
Just like that, you've set up two-factor authentication on your Google account. Congrats!
You can't go wrong with either the Google Prompt or Google Authenticator, so feel free to choose whichever one works best for you. Google Authenticator might be a better choice if you have a bunch of other apps/sites that are also set up with two-factor, as it can act as one central place for all of your codes.
I personally use Google Prompt since it offers just a little extra touch of speed and convenience that's nice to have if you're frequently logging in and out of your account. This is a matter of personal preference, so feel free to go with whichever one tickles your fancy.


Post a Comment